Getting Started with TV Labs Automation
Introduction
This tutorial will guide you through creating your first vision-based automated test for a smart TV app. By the end, you'll have a practical understanding of how TV Labs can enhance your app testing process.
What to expect:
- ⏱️ Duration: 5-10 minutes
- 🎯 Audience: Newcomers to TV Labs automation
- 🧠 Outcome: Understand the basics of vision-based automation
- 🖥️ Hands-on: Run your first automation on a real device
You will learn about two important tools:
- The Region Designer, which mimics human visual perception, allows for precise UI element targeting and works across different TV models and resolutions.
- The Workflow Automator, which offers a No-code approach for easy test creation, can replicates user interactions and and integrates AI for smarter testing
Let's get started!
Creating a New Project
- Navigate to https://tvlabs.ai/app/projects. Look for the Sparkles icon in the menu labeled "NoCode".
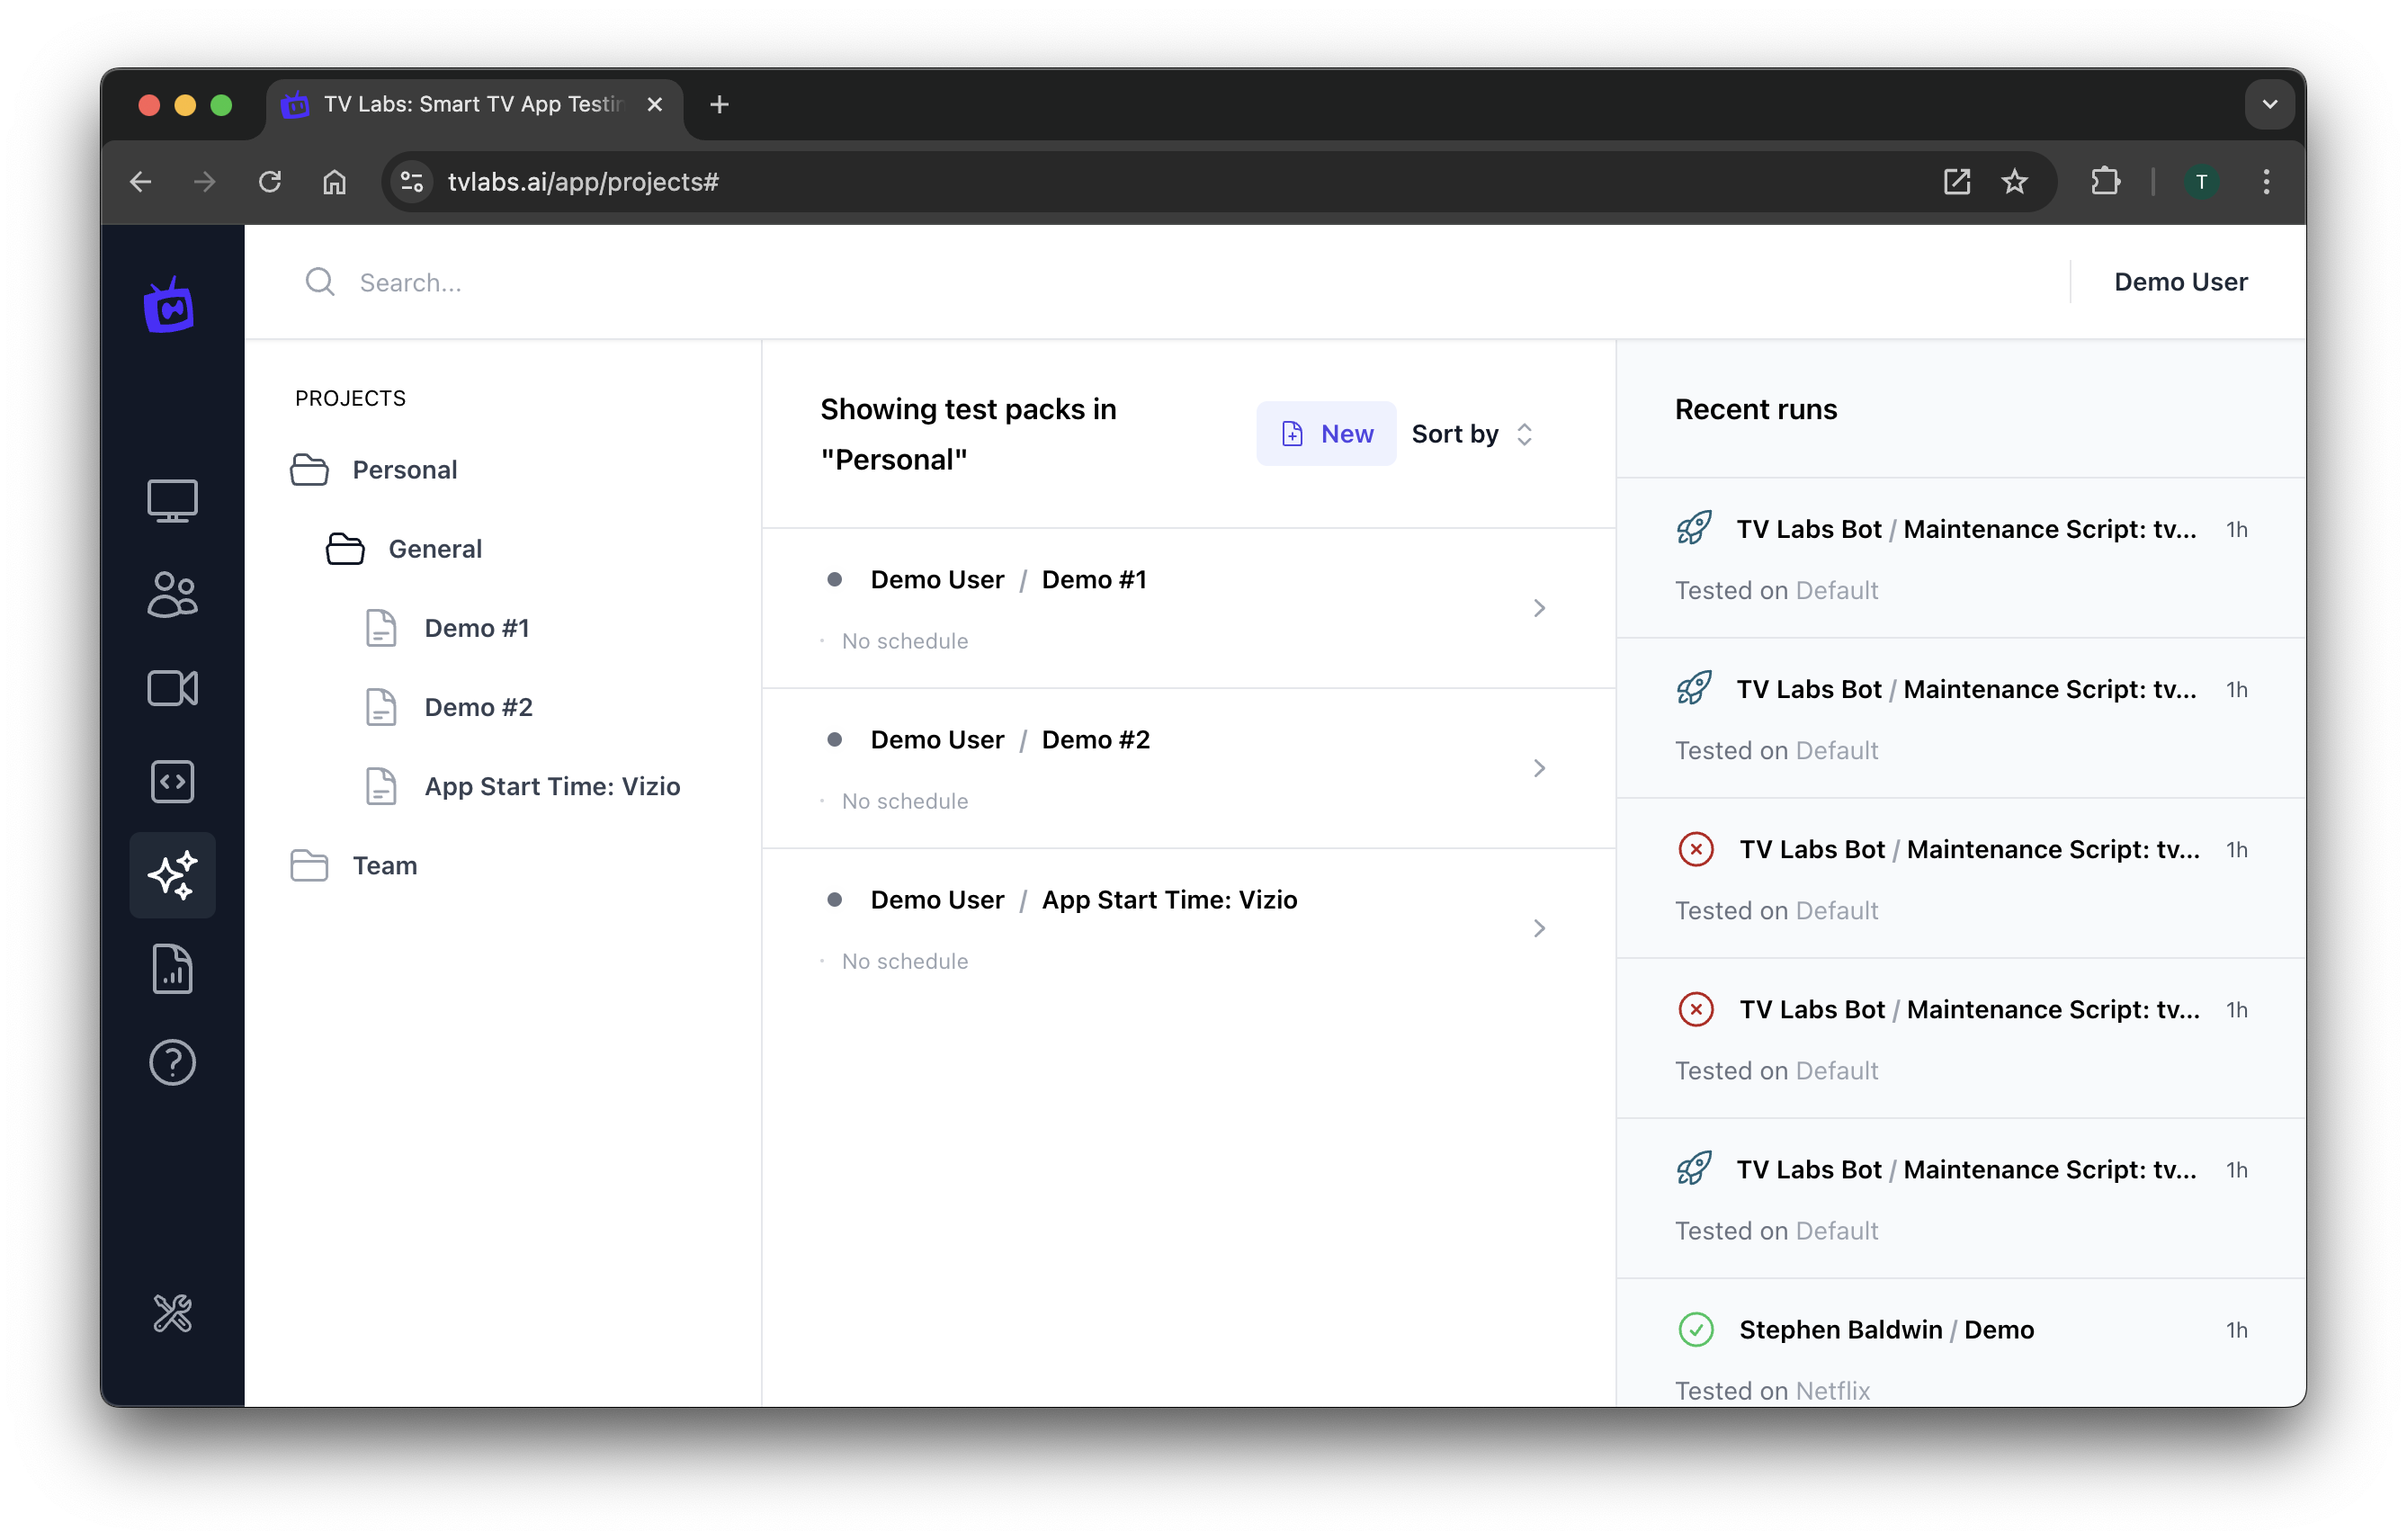 Figure 1: Project Dashboard
- Click on " New" to create your project.
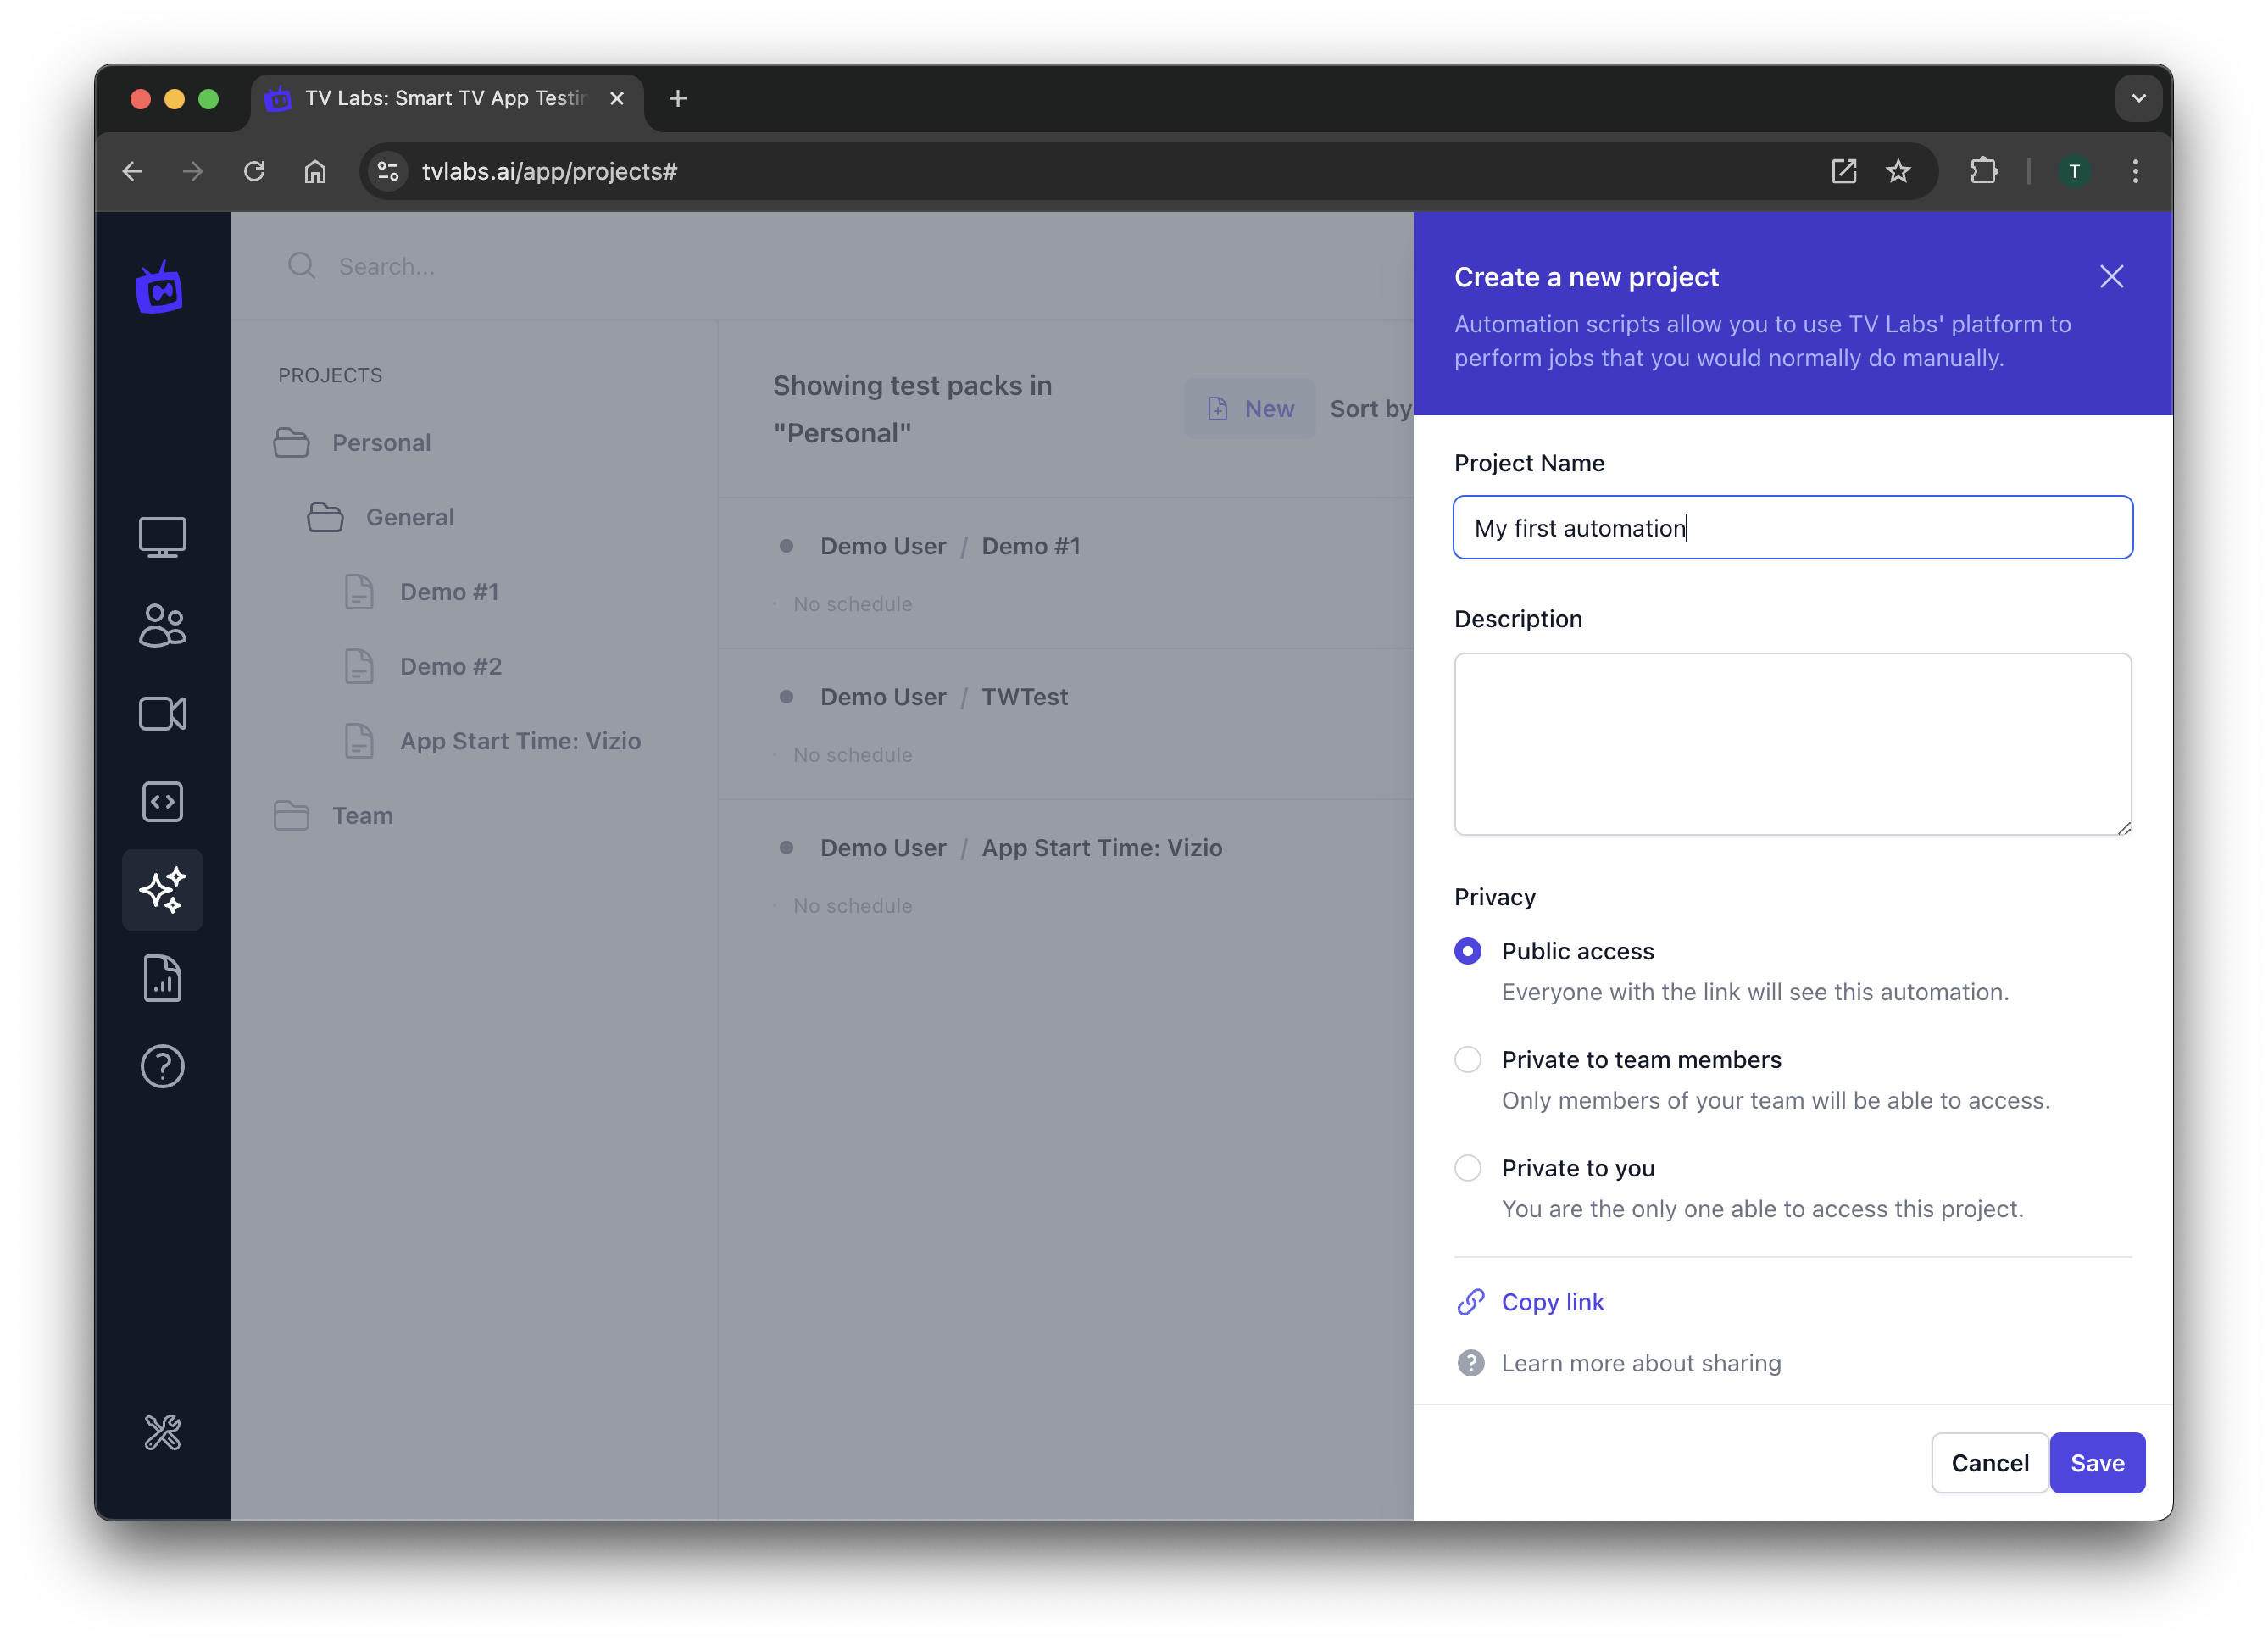 Figure 2: Creating a new project
Using the Region Designer
The Region Designer is a powerful tool that allows you to mark up specific areas of your app's user interface and define what you expect to see in those areas. This is a key component of vision-based automation, as it allows your tests to interact with the app just like a real user would - by looking at the screen.
- Start by uploading a screenshot or screen capture of your TV app's UI. You can obtain these using the screenshot feature in the access session.
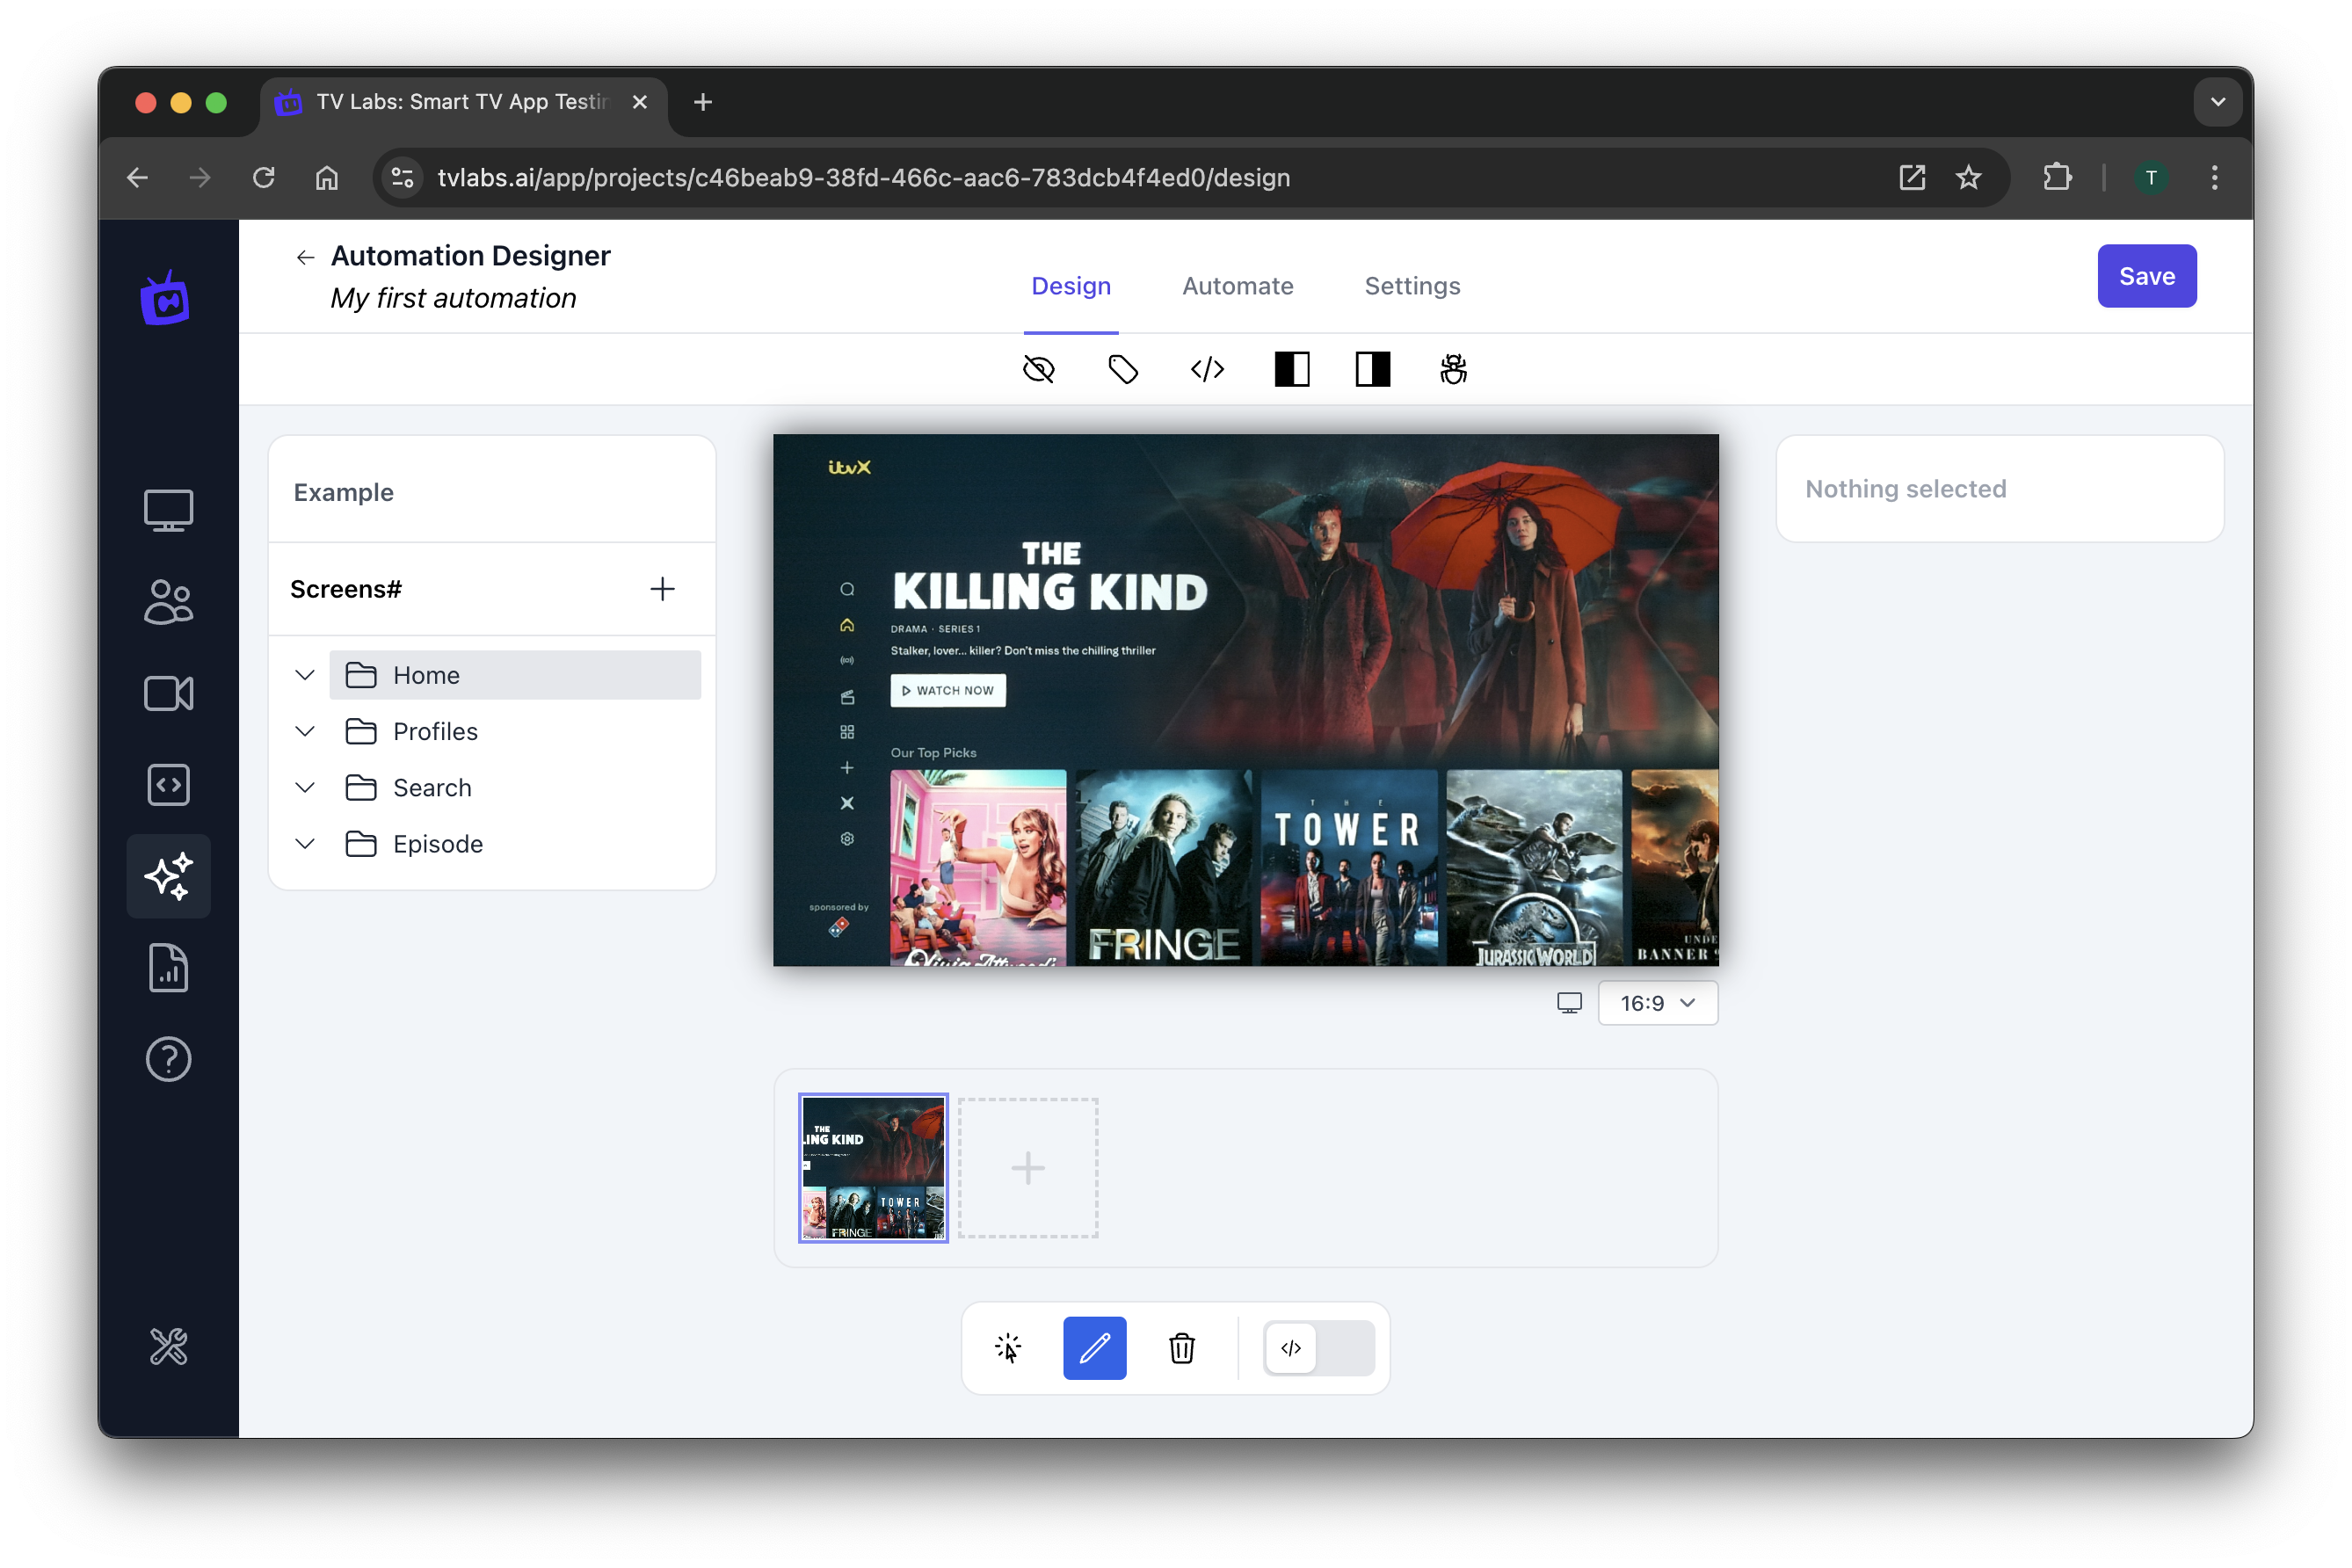 Figure 3: Region Designer with uploaded screen capture
- Let's add a text matcher:
- Select a region on the screen containing text
- Name it "Text matcher"
- Set the expected text (e.g., "Killing kind" - case insensitive by default)
Text matchers are useful for verifying that specific text appears on the screen, which can help confirm that the correct page or content is loaded.
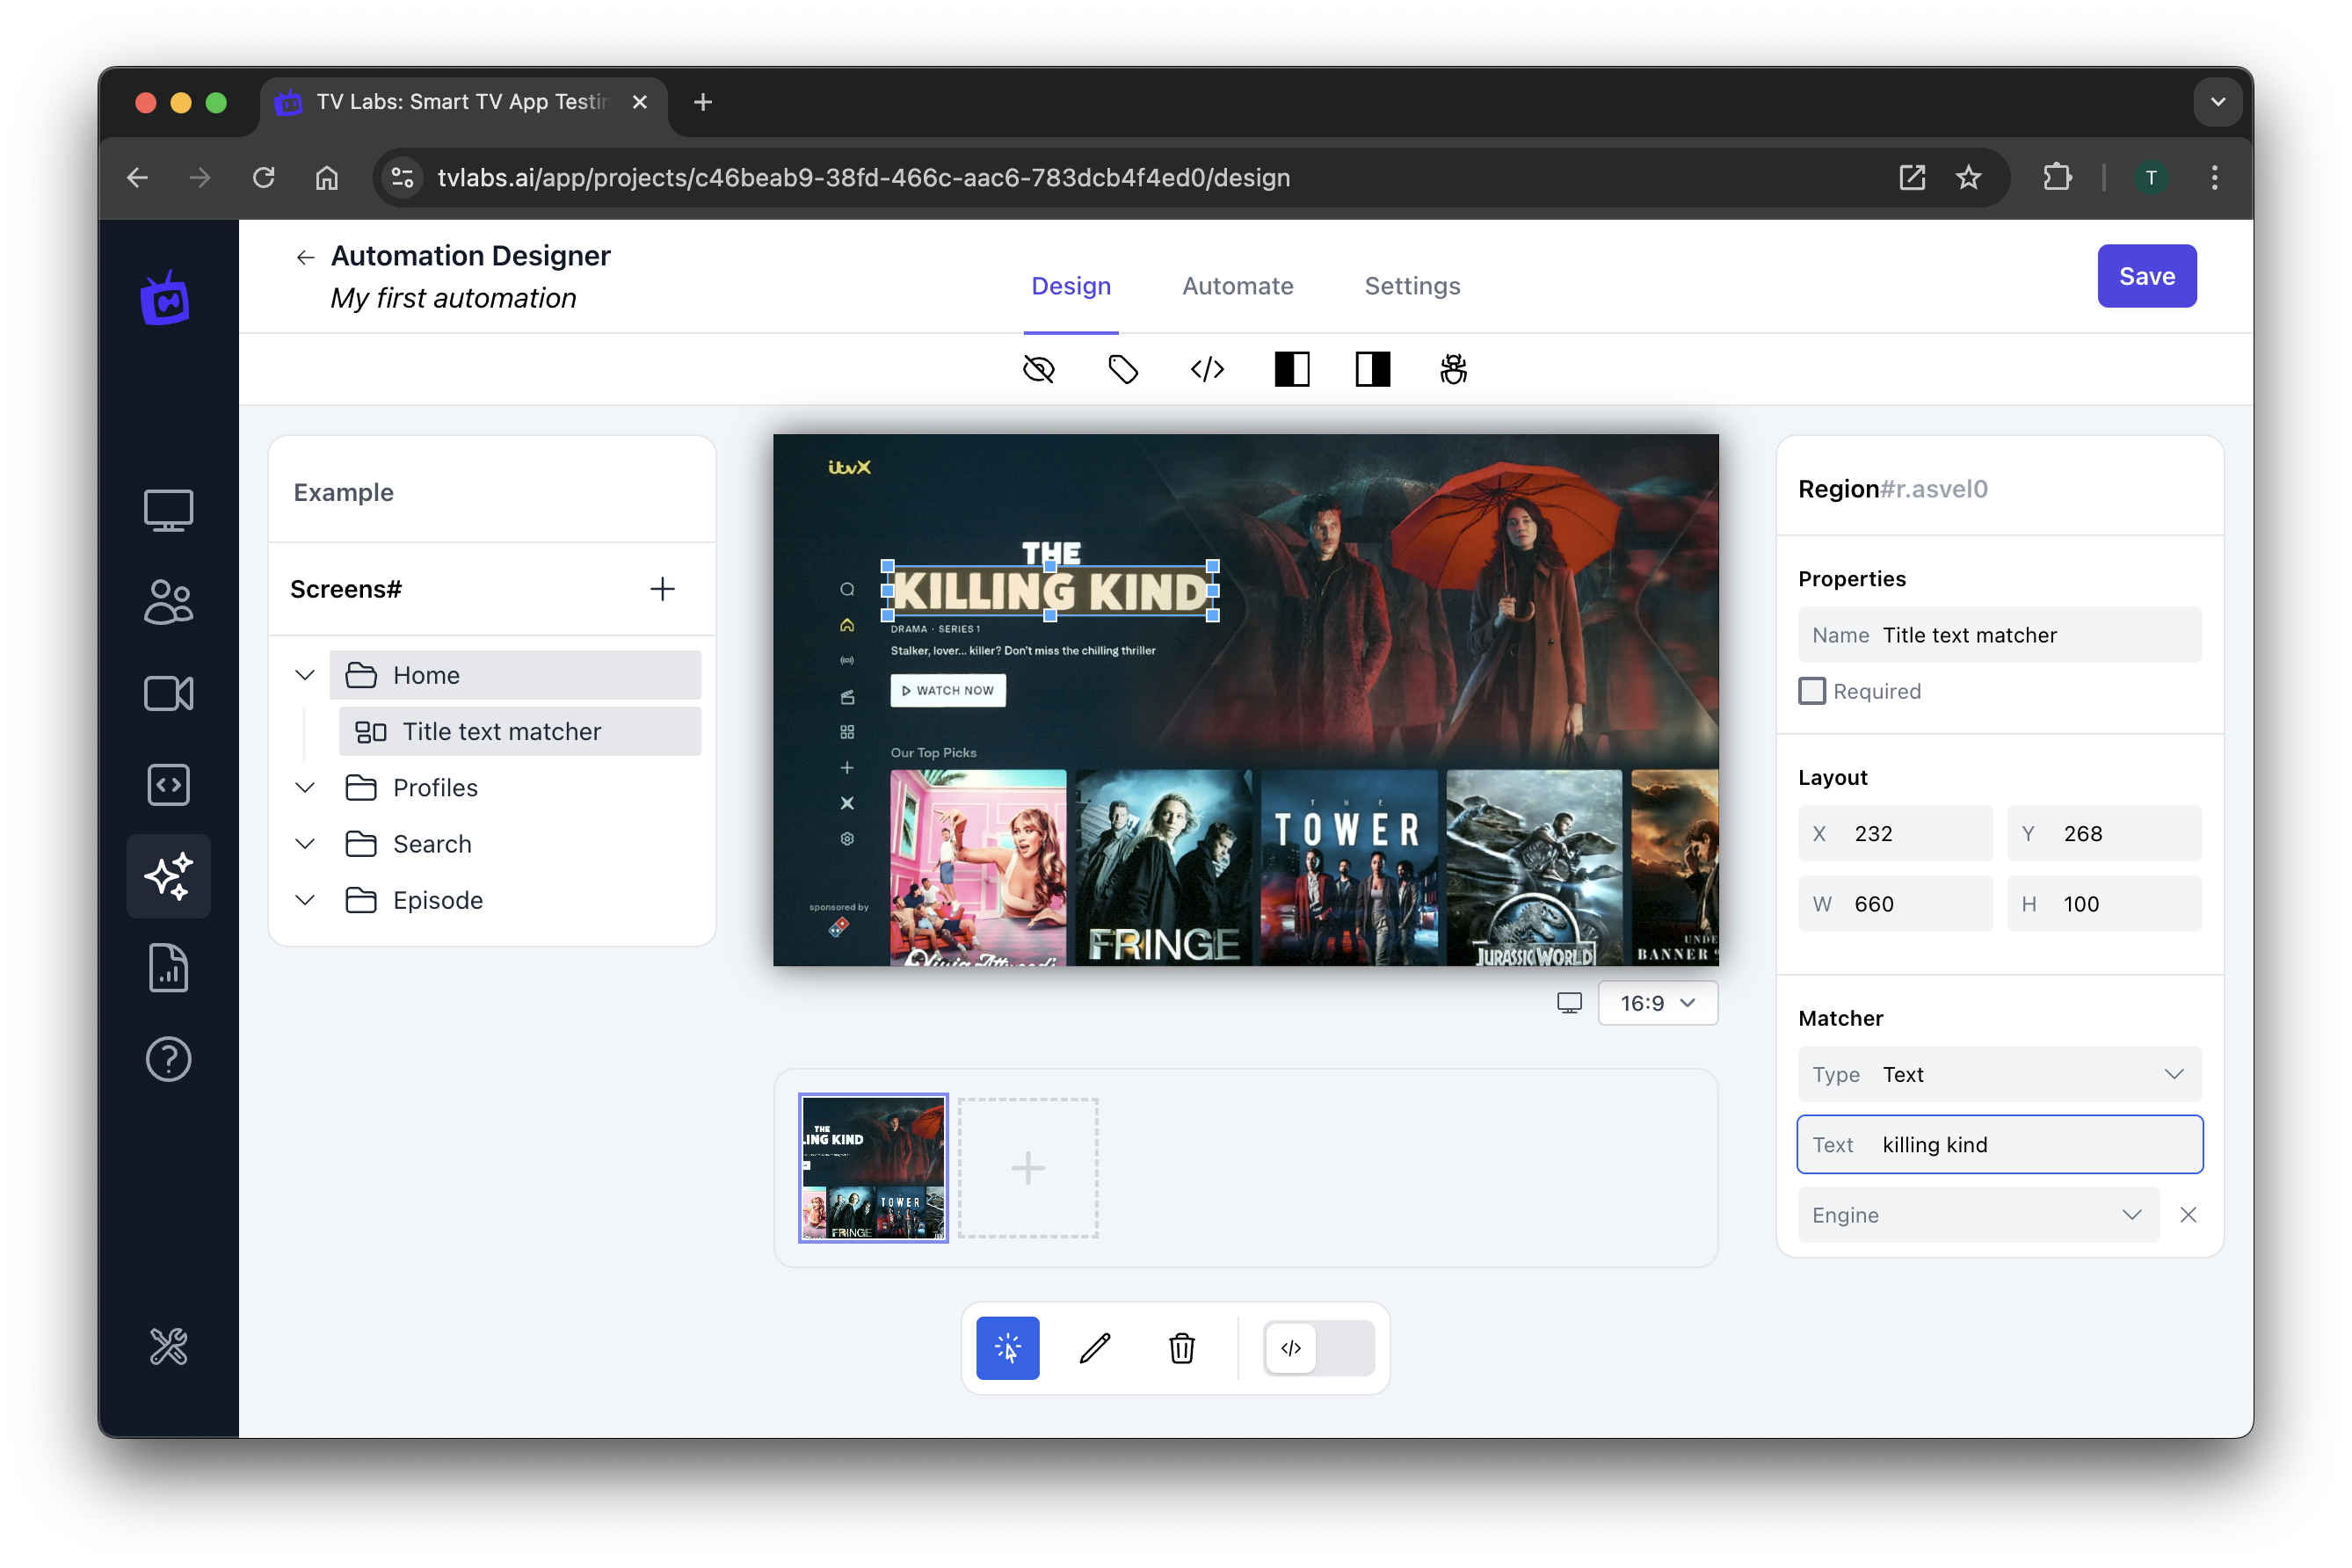 Figure 4: Configuring a text matcher
- Now, let's add a color matcher:
- Draw a region around the app logo
- Name it "Color matcher"
- Use "Analyze Colors" to detect dominant colors
- Select the target color
Color matchers are great for identifying UI elements that might not have text, like logos or buttons. They're particularly useful when text recognition might be challenging.
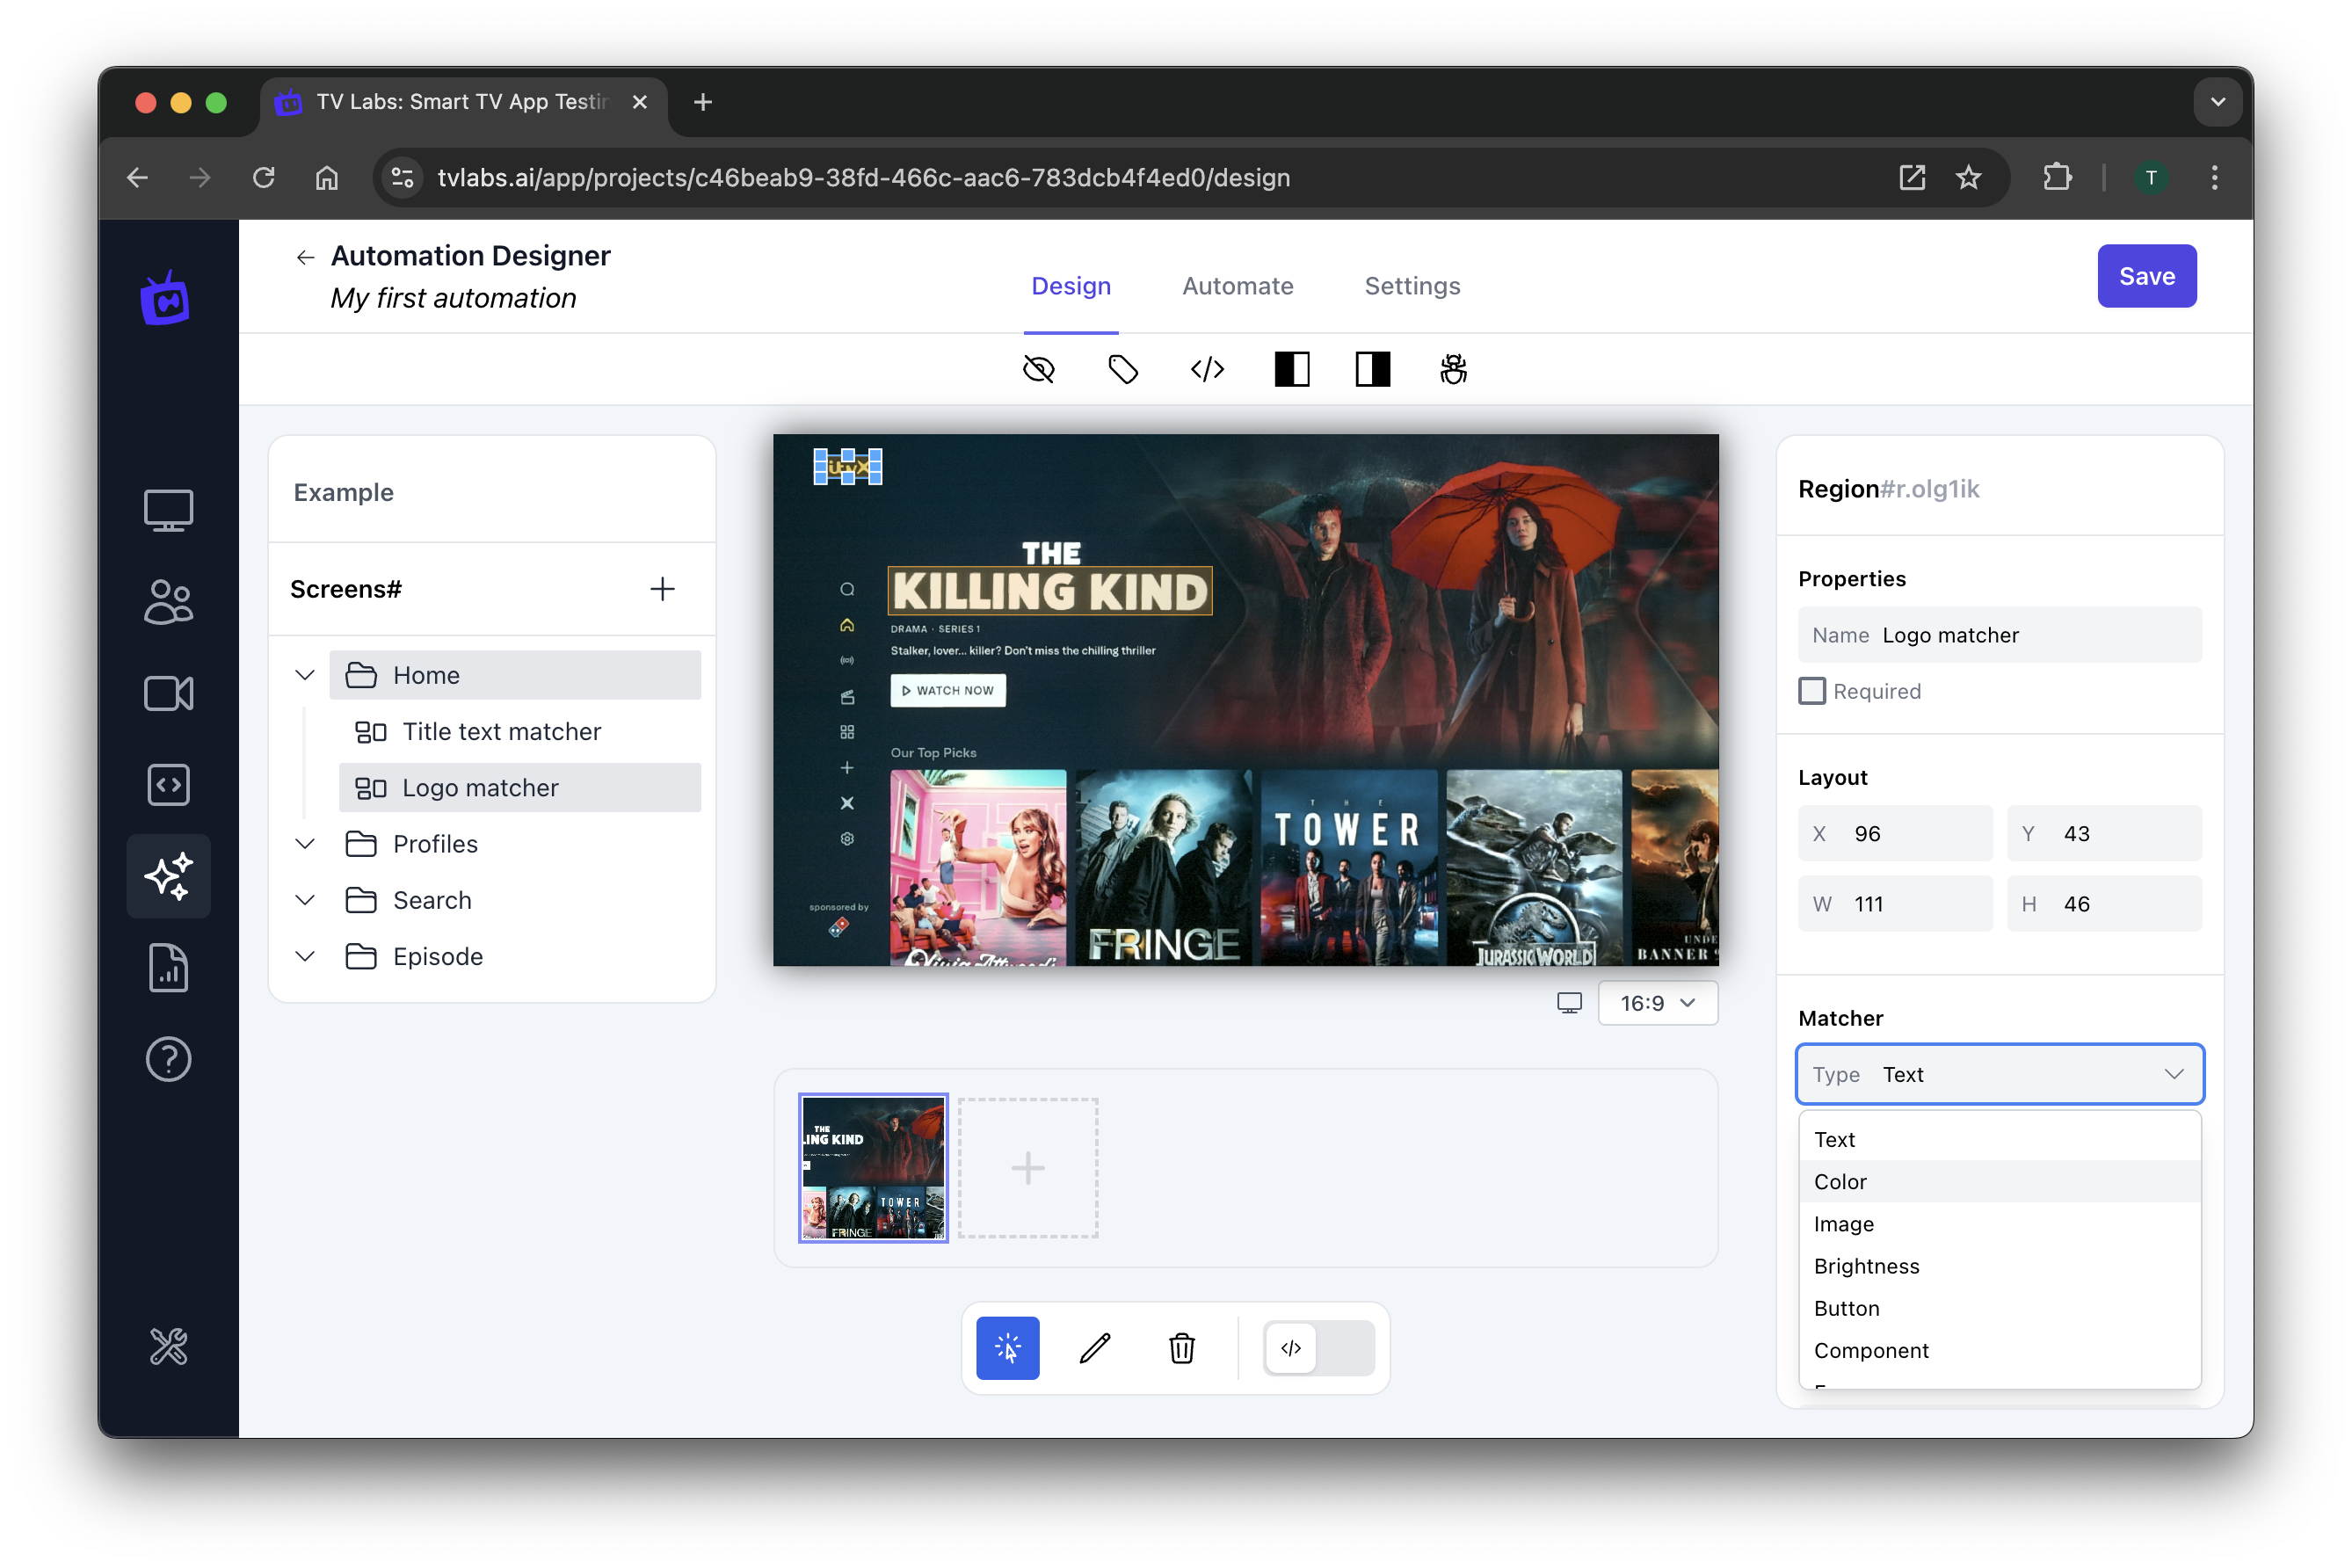 Figure 5: Setting up a color matcher
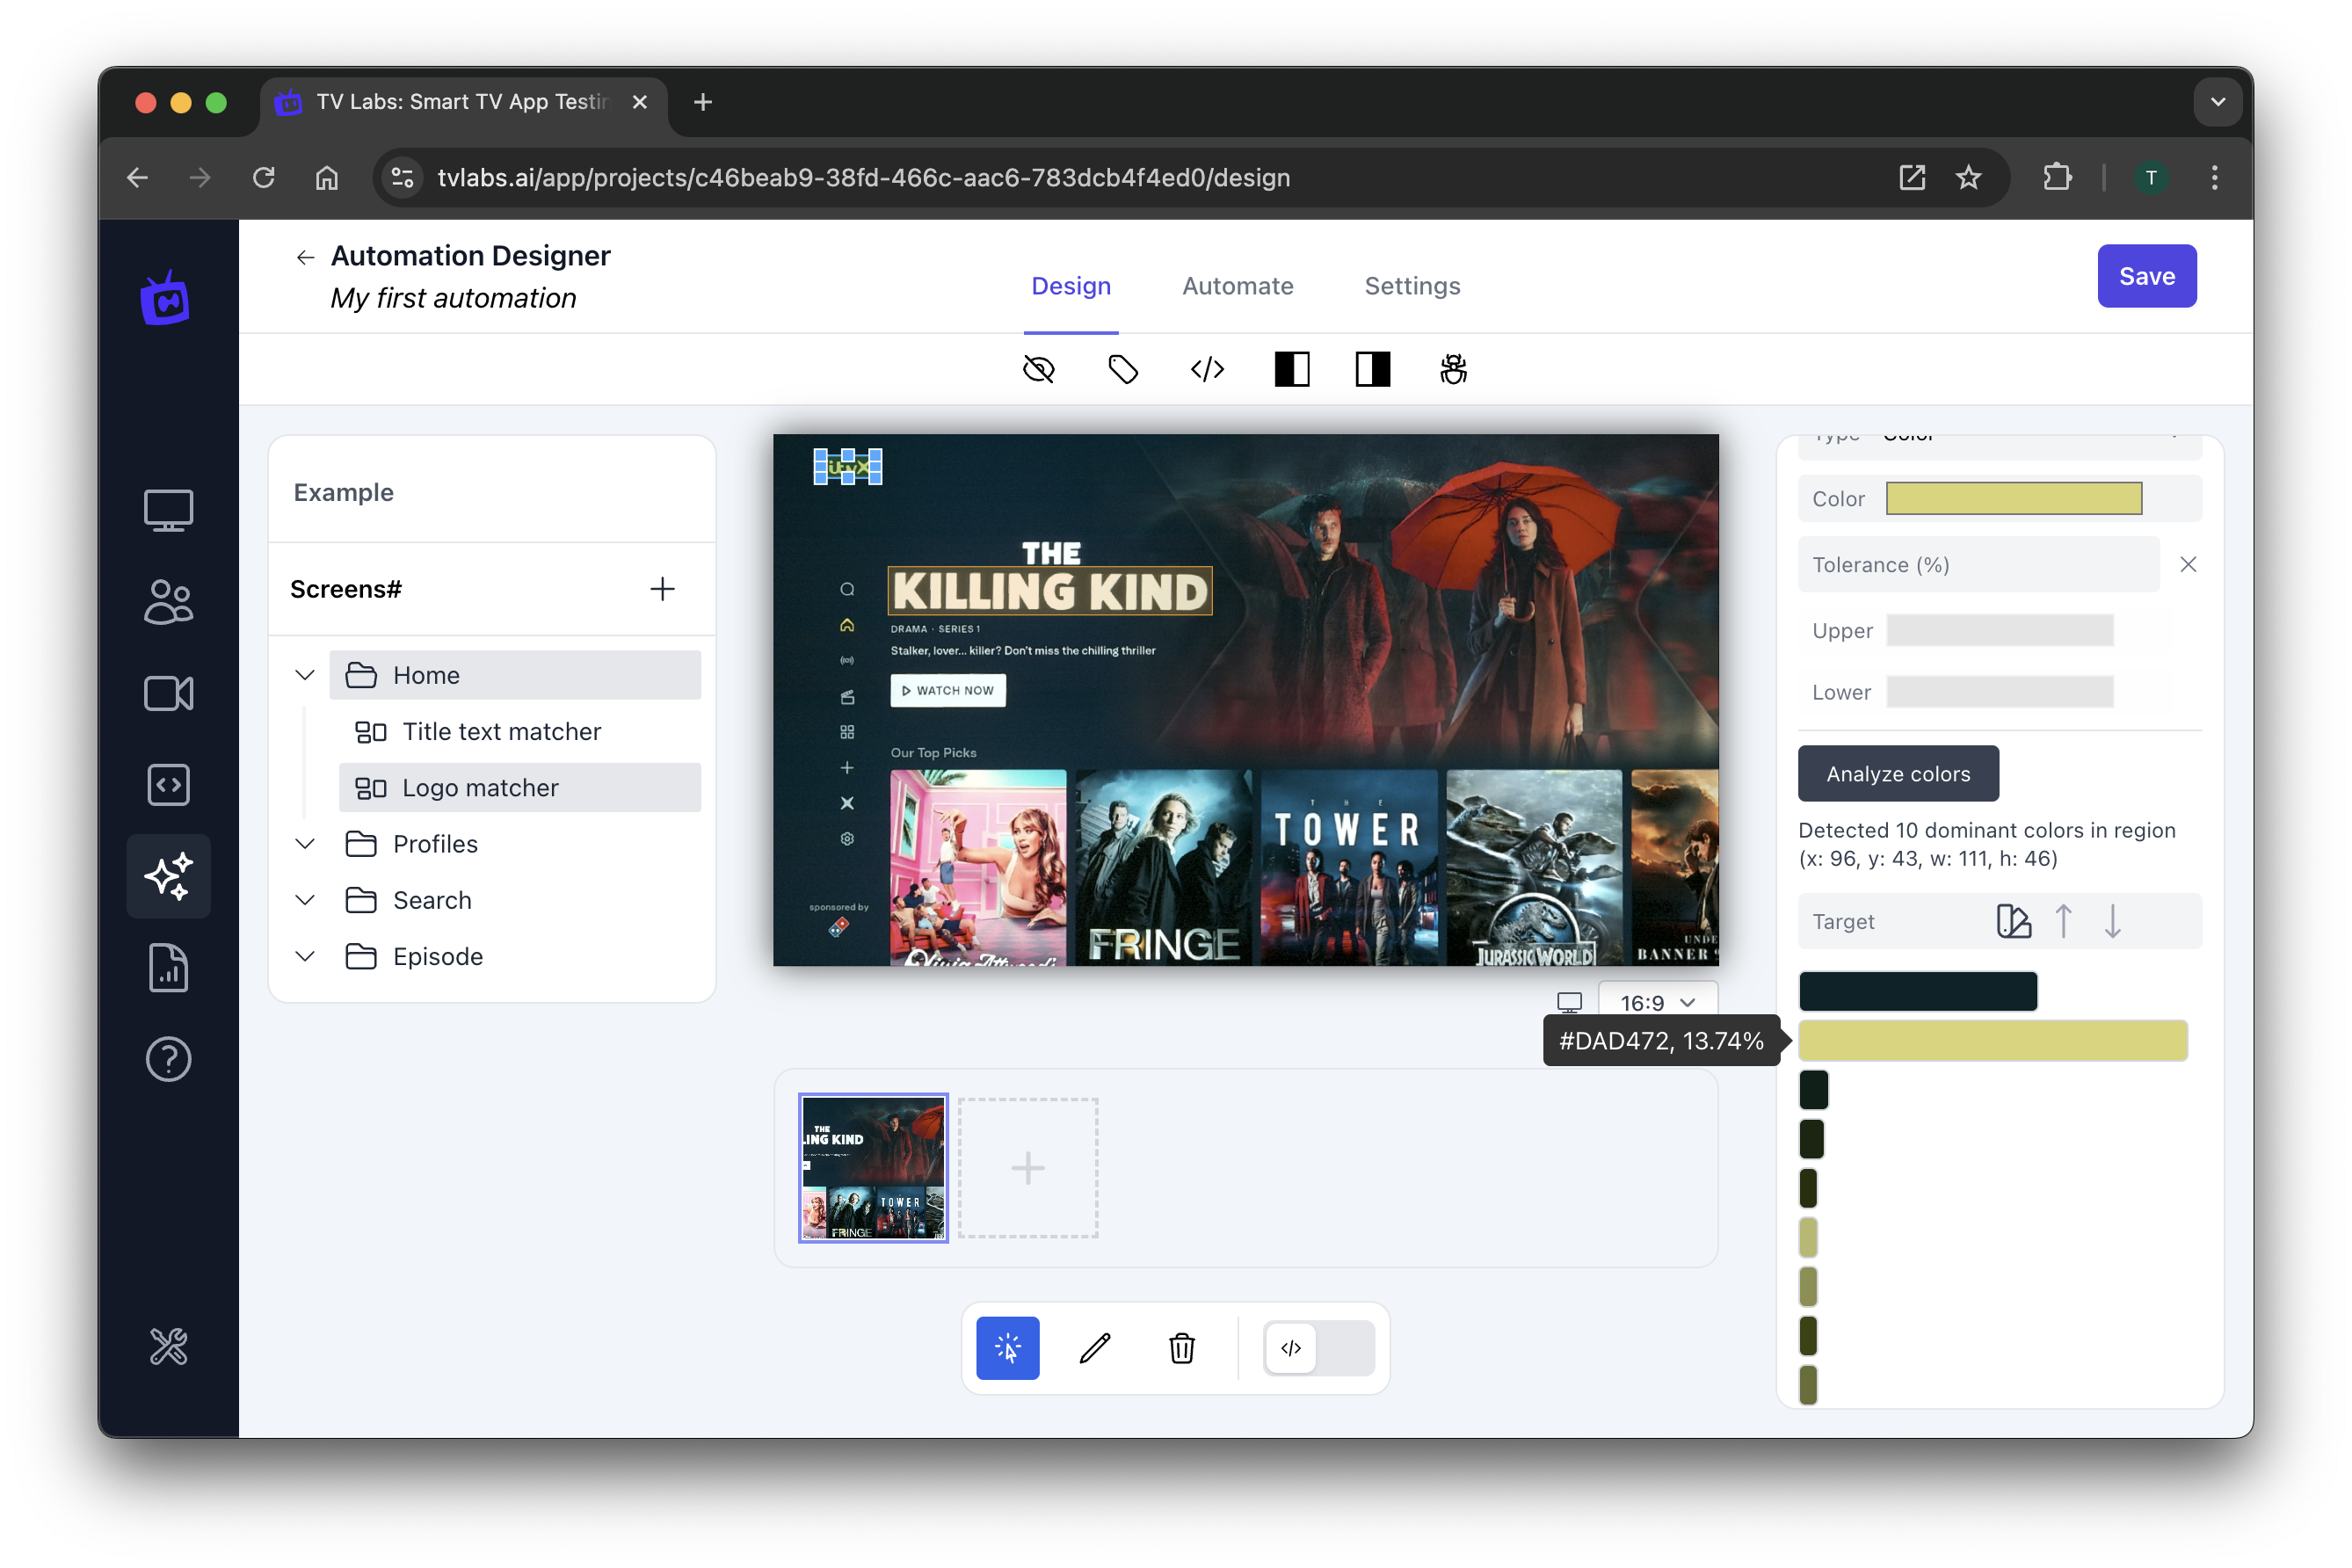 Figure 6: Selecting the target color
- Set the tolerance to 10% to allow for slight color variations
Setting a tolerance allows for small differences in color that might occur due to different TV models or settings.
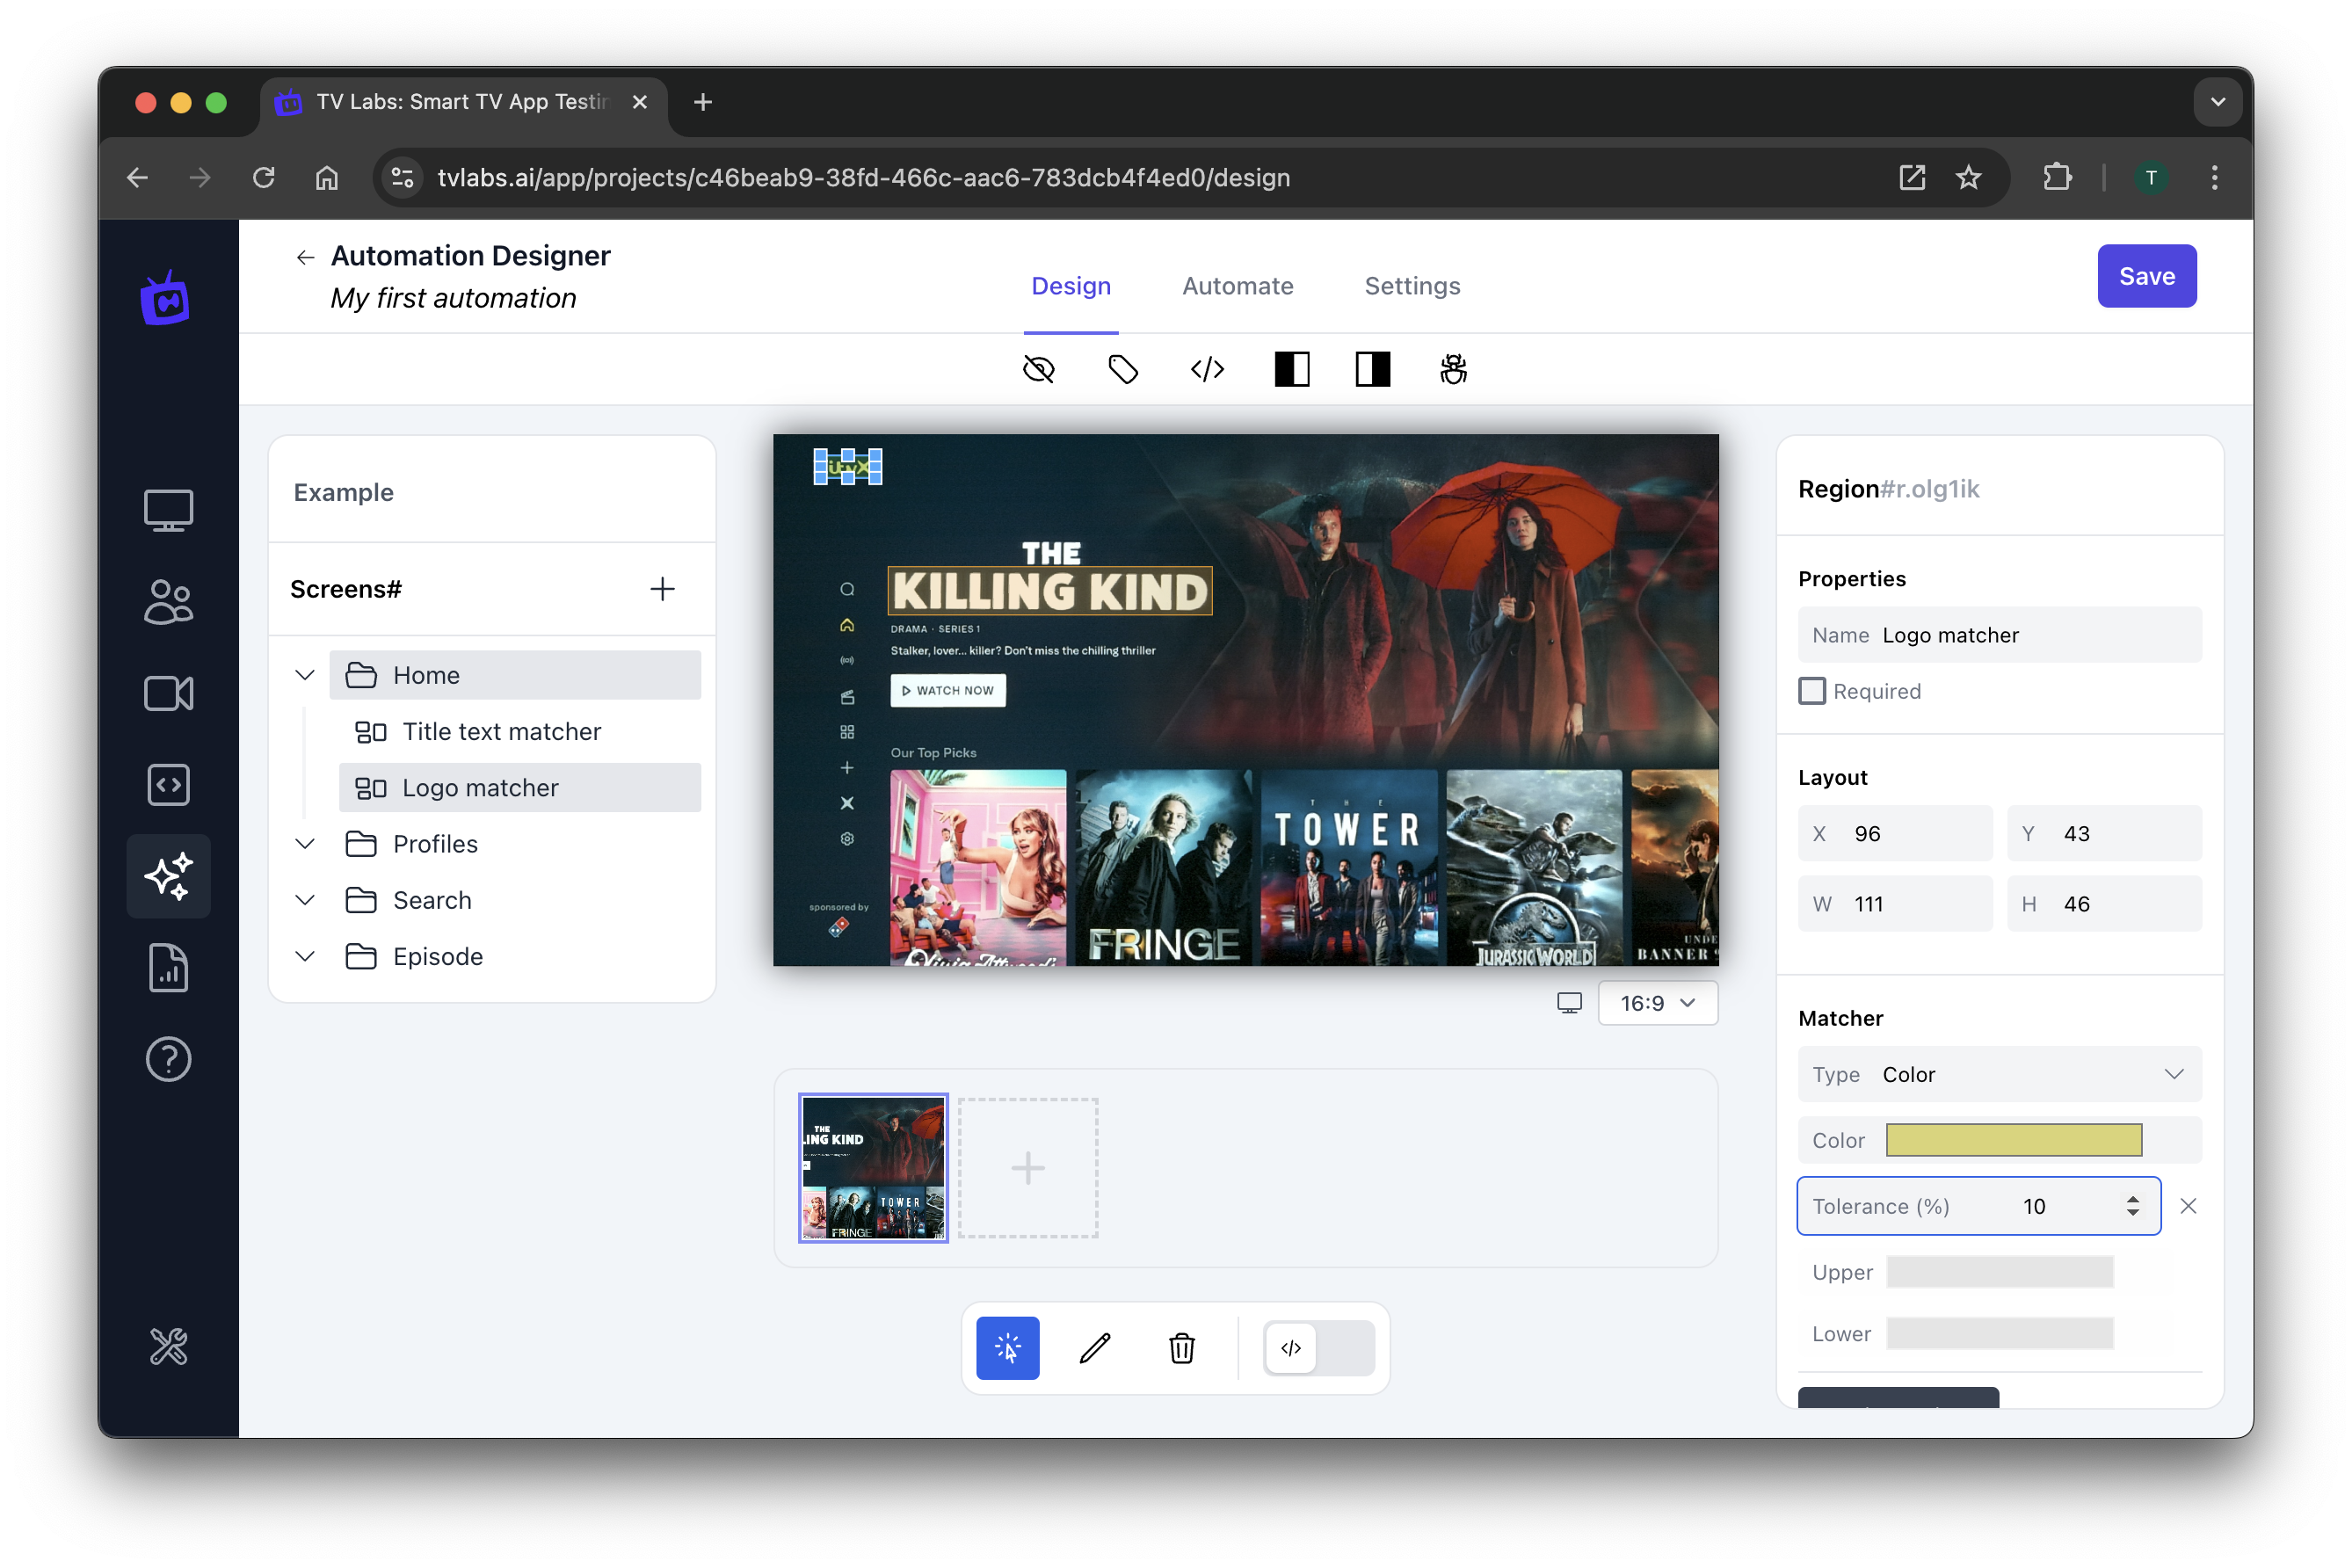 Figure 7: Setting color tolerance
- You can view the XML representation of your regions for a more technical perspective.
This XML view shows how your visual selections are translated into code, which can be useful for understanding the underlying structure or for manual tweaking if needed.
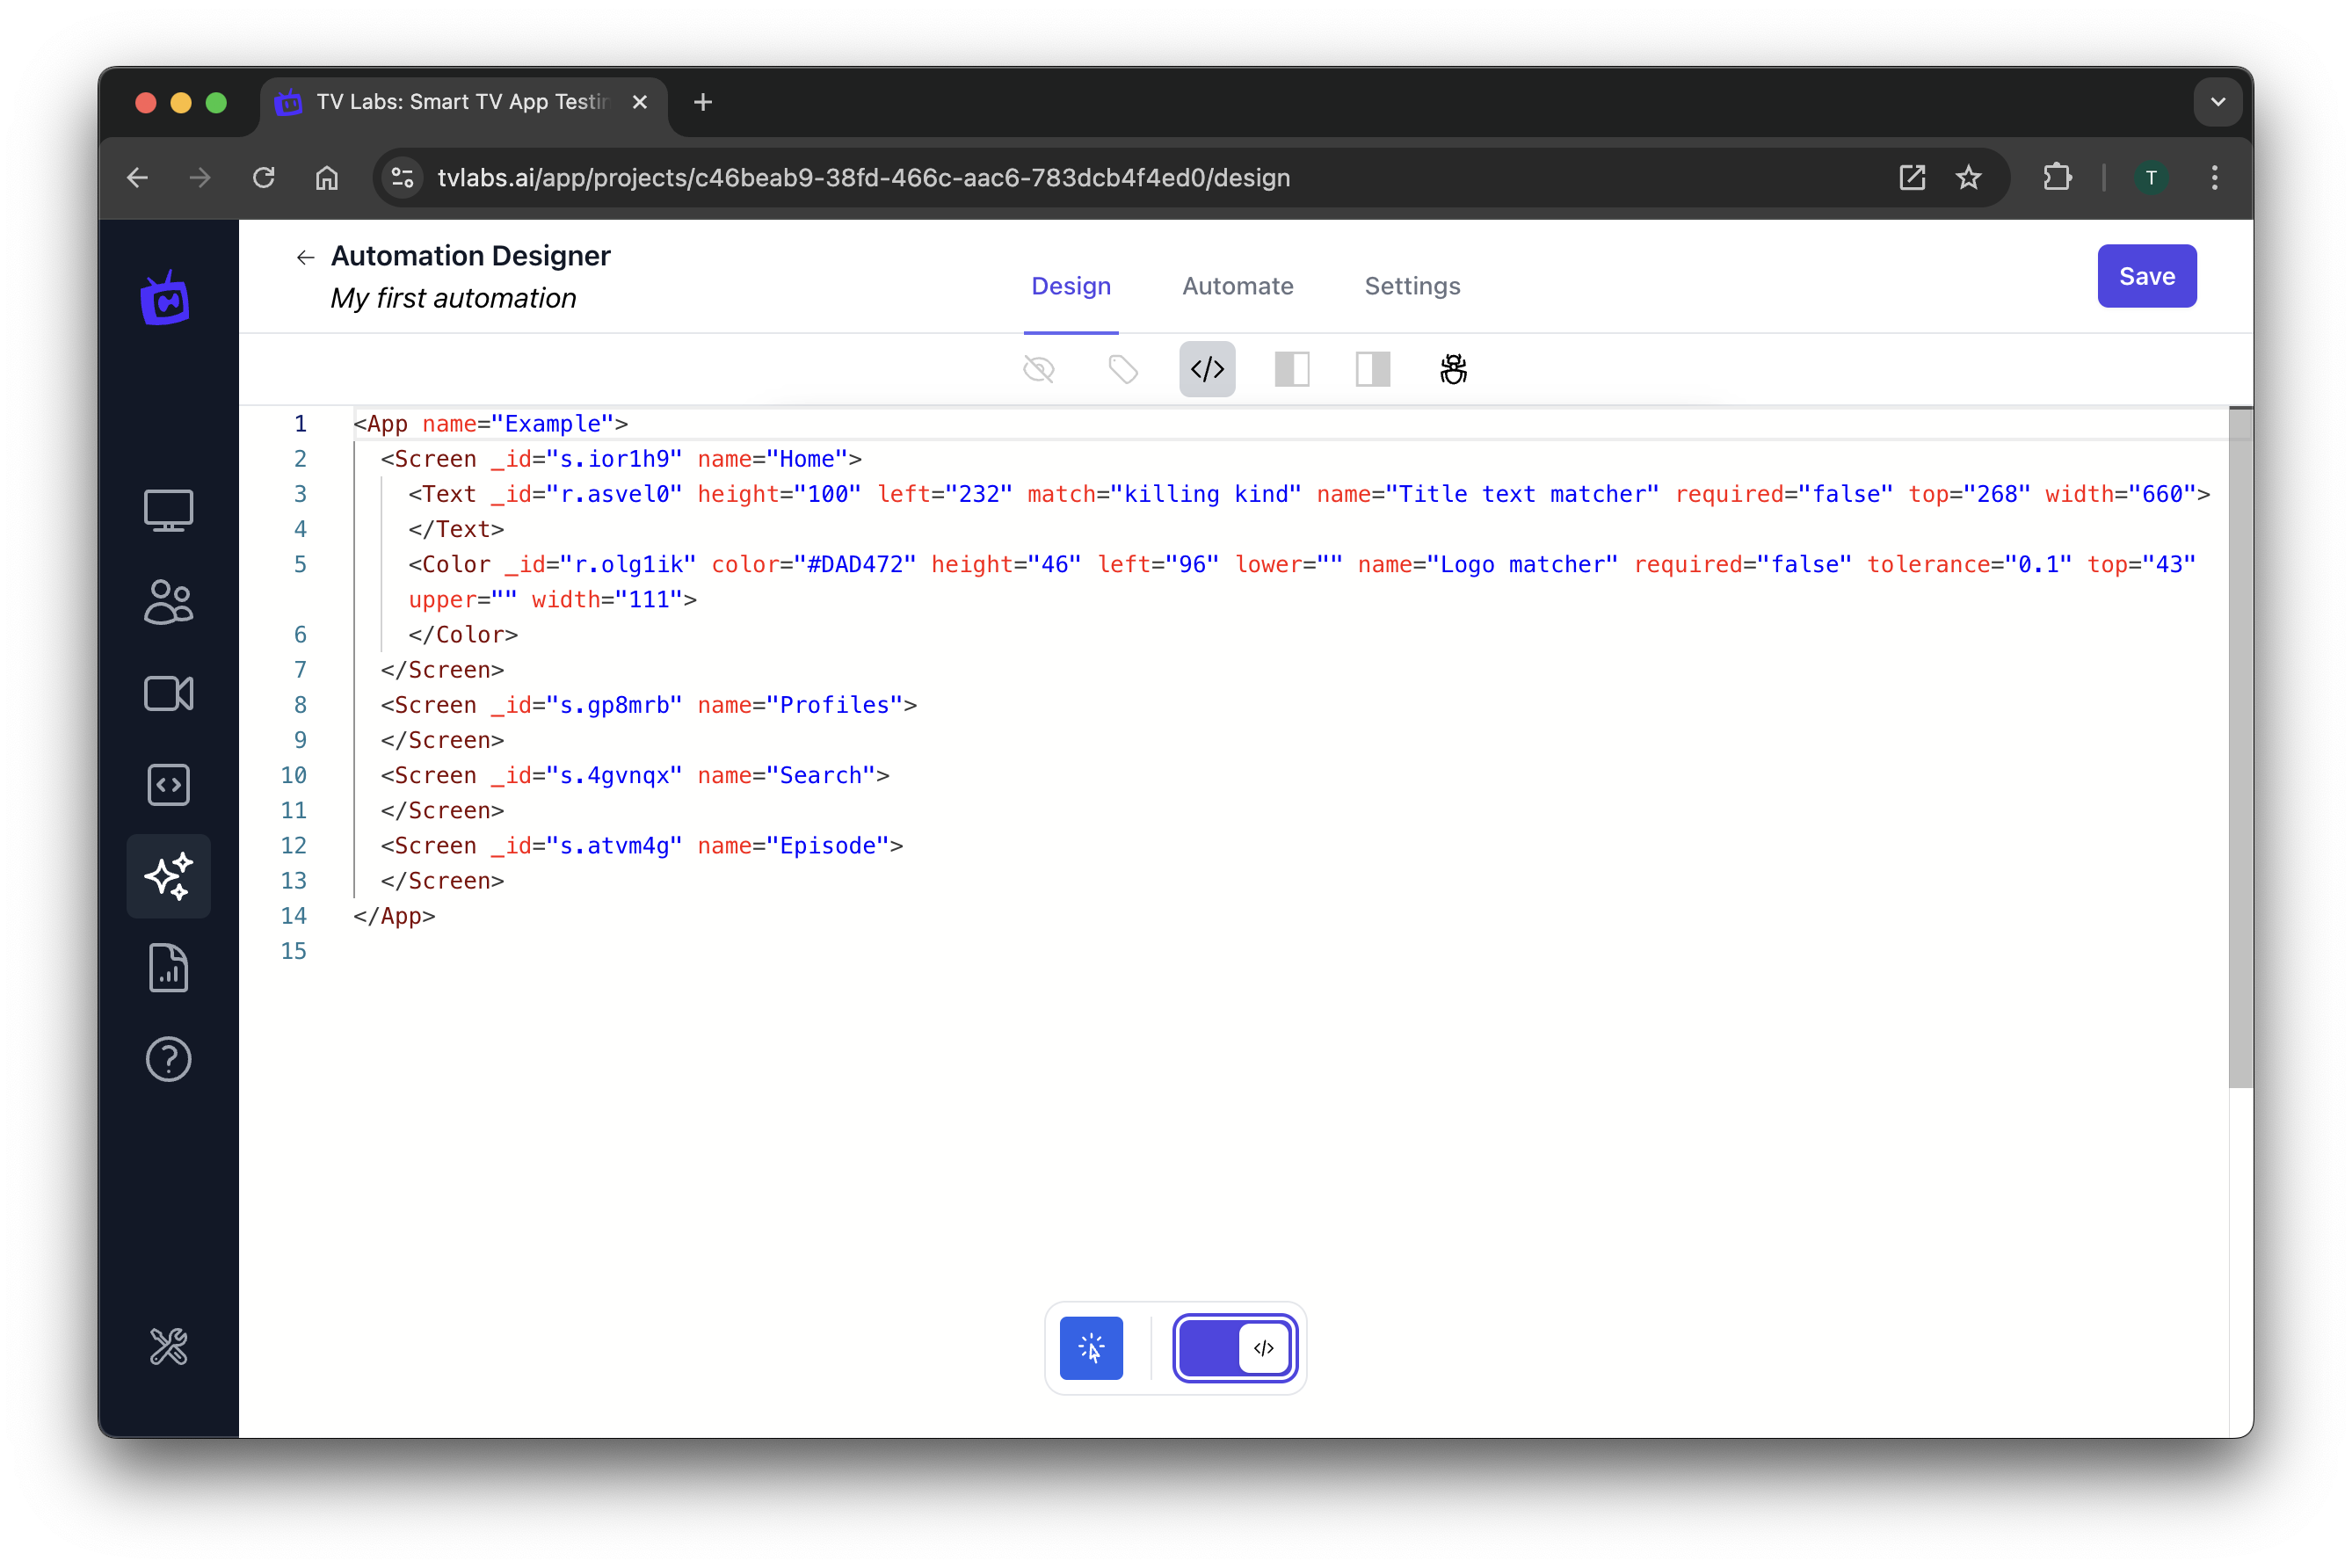 Figure 8: XML preview of defined regions
By using a combination of text and color matchers, you can create robust checks that verify your app's UI is appearing correctly across different devices and scenarios.
Designing Your Workflow
The Workflow Designer is where you'll create the actual sequence of actions and checks that make up your automated test. It uses a no-code, block-based approach, making it accessible even if you're not a programmer.
- Switch to the "Automate" tab
This is where you'll build your test workflow step by step.
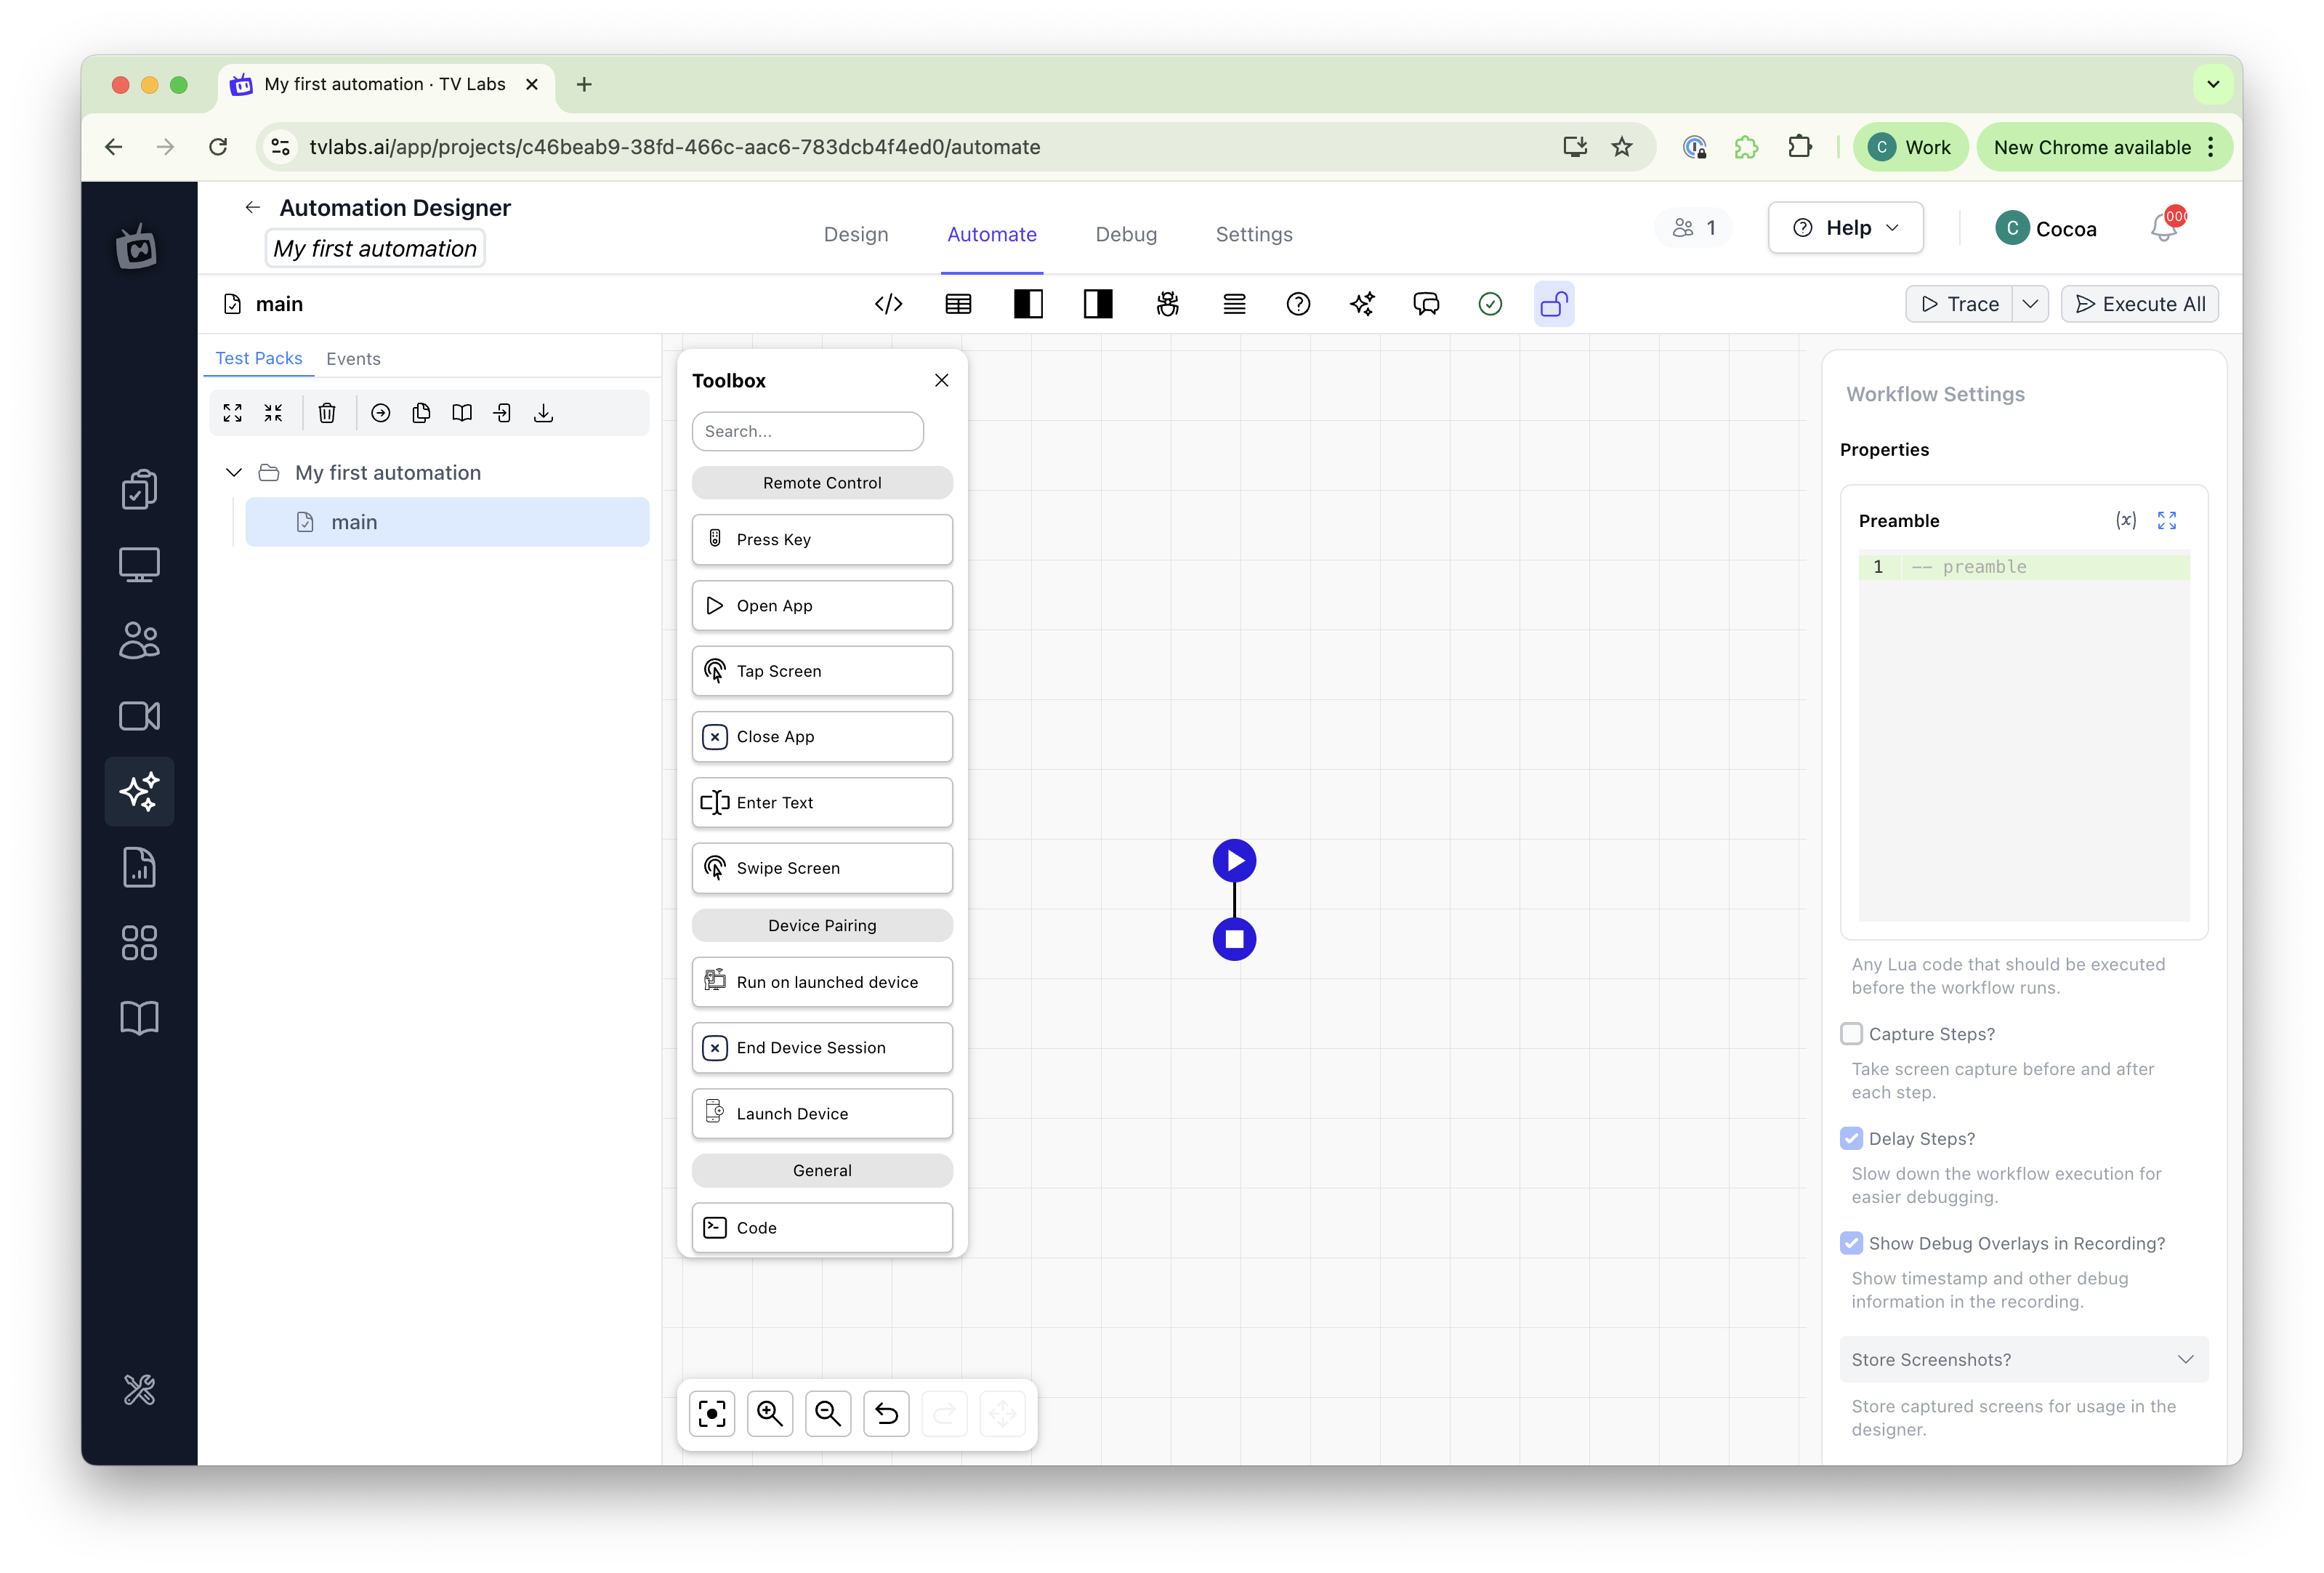 Figure 9: Accessing the Automate tab
- Add an "Open App" block
This block simulates launching the app (and the exact build, if specified) of your selection from the Debug/Trace panel on the TV, just like a user would do.
 Figure 10: Adding an Open App block
- Add a
Press Keyblock to navigate to the home screen- Set the sequence:
left,top(8 times),enter
- Set the sequence:
This block simulates pressing buttons on the TV remote. We're using it here to ensure we start on the home screen, but you can use it to navigate anywhere in your app.
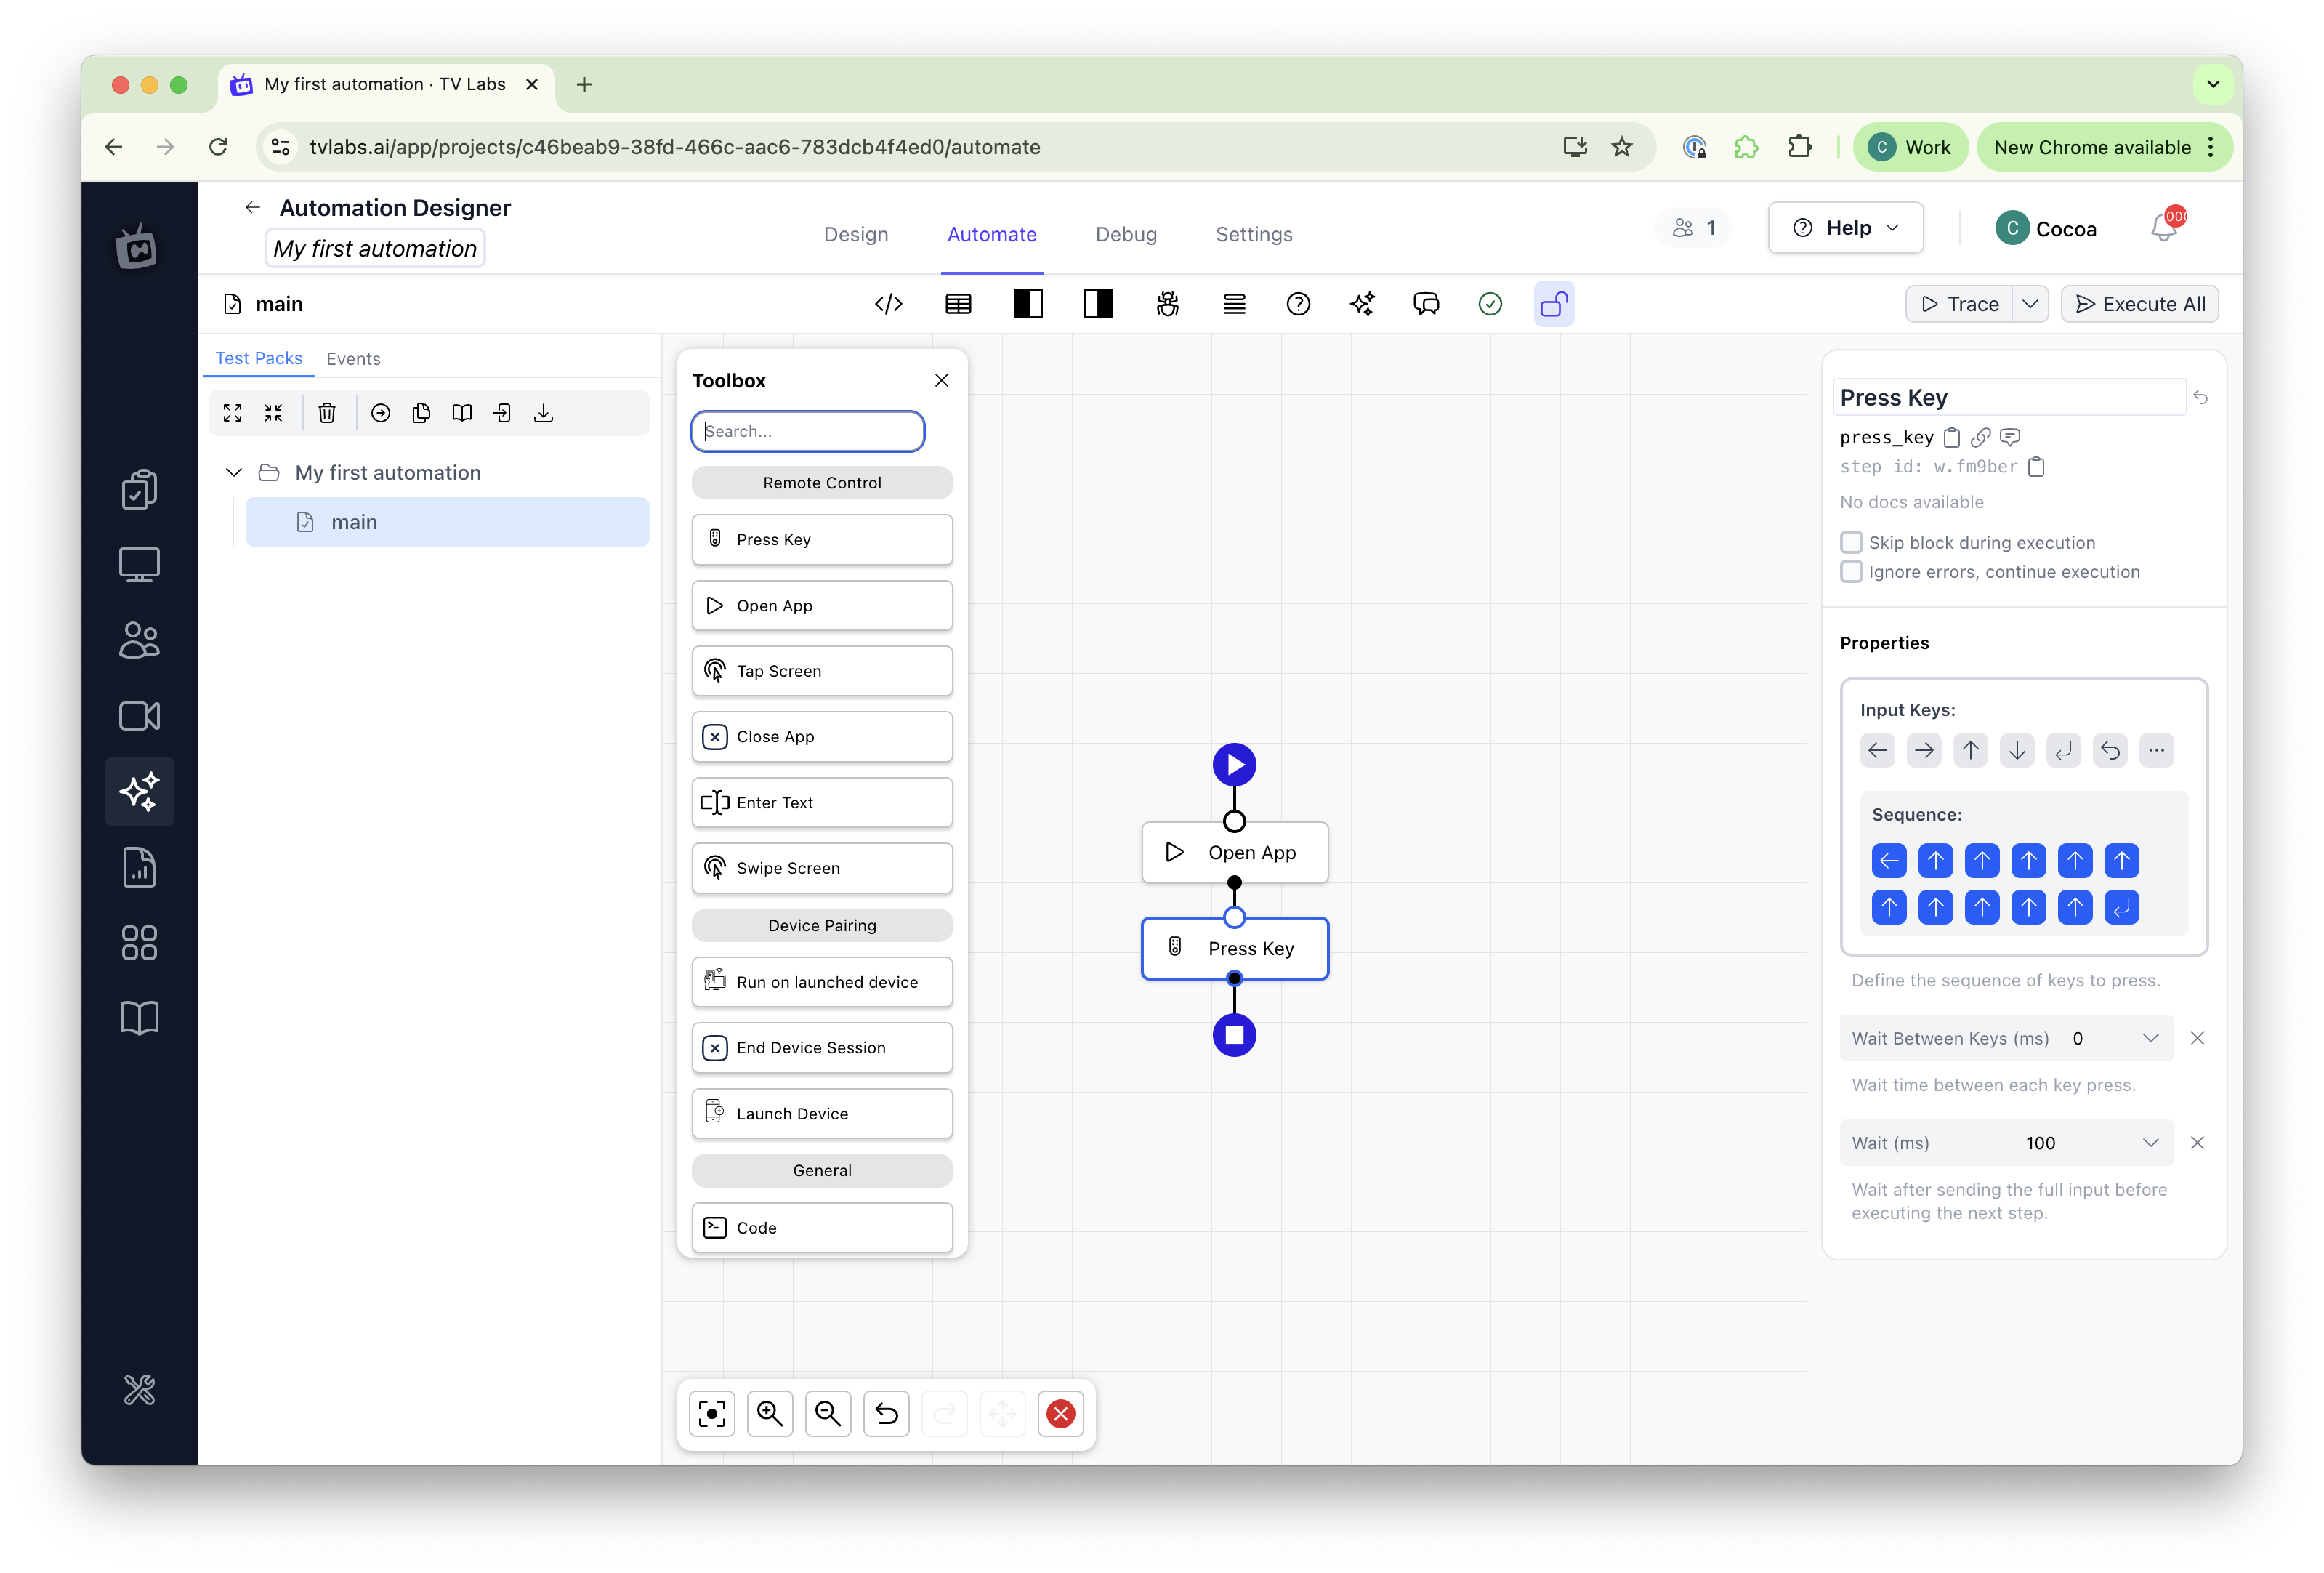 Figure 11: Configuring a
 Press Key block
- Add a
Waitblock with a 1-second timeout
Wait blocks are useful when you need to pause for the app to load or respond to inputs. They help make your tests more reliable by allowing time for UI changes.
 Figure 12: Adding a Wait block
- Add an
Wait for Regionblock- Select the regions created earlier: "Color matcher" and "Text matcher"
This block uses the regions you defined in the Region Designer to check if the expected content is on the screen. It's a key part of verifying that your app is in the correct state.
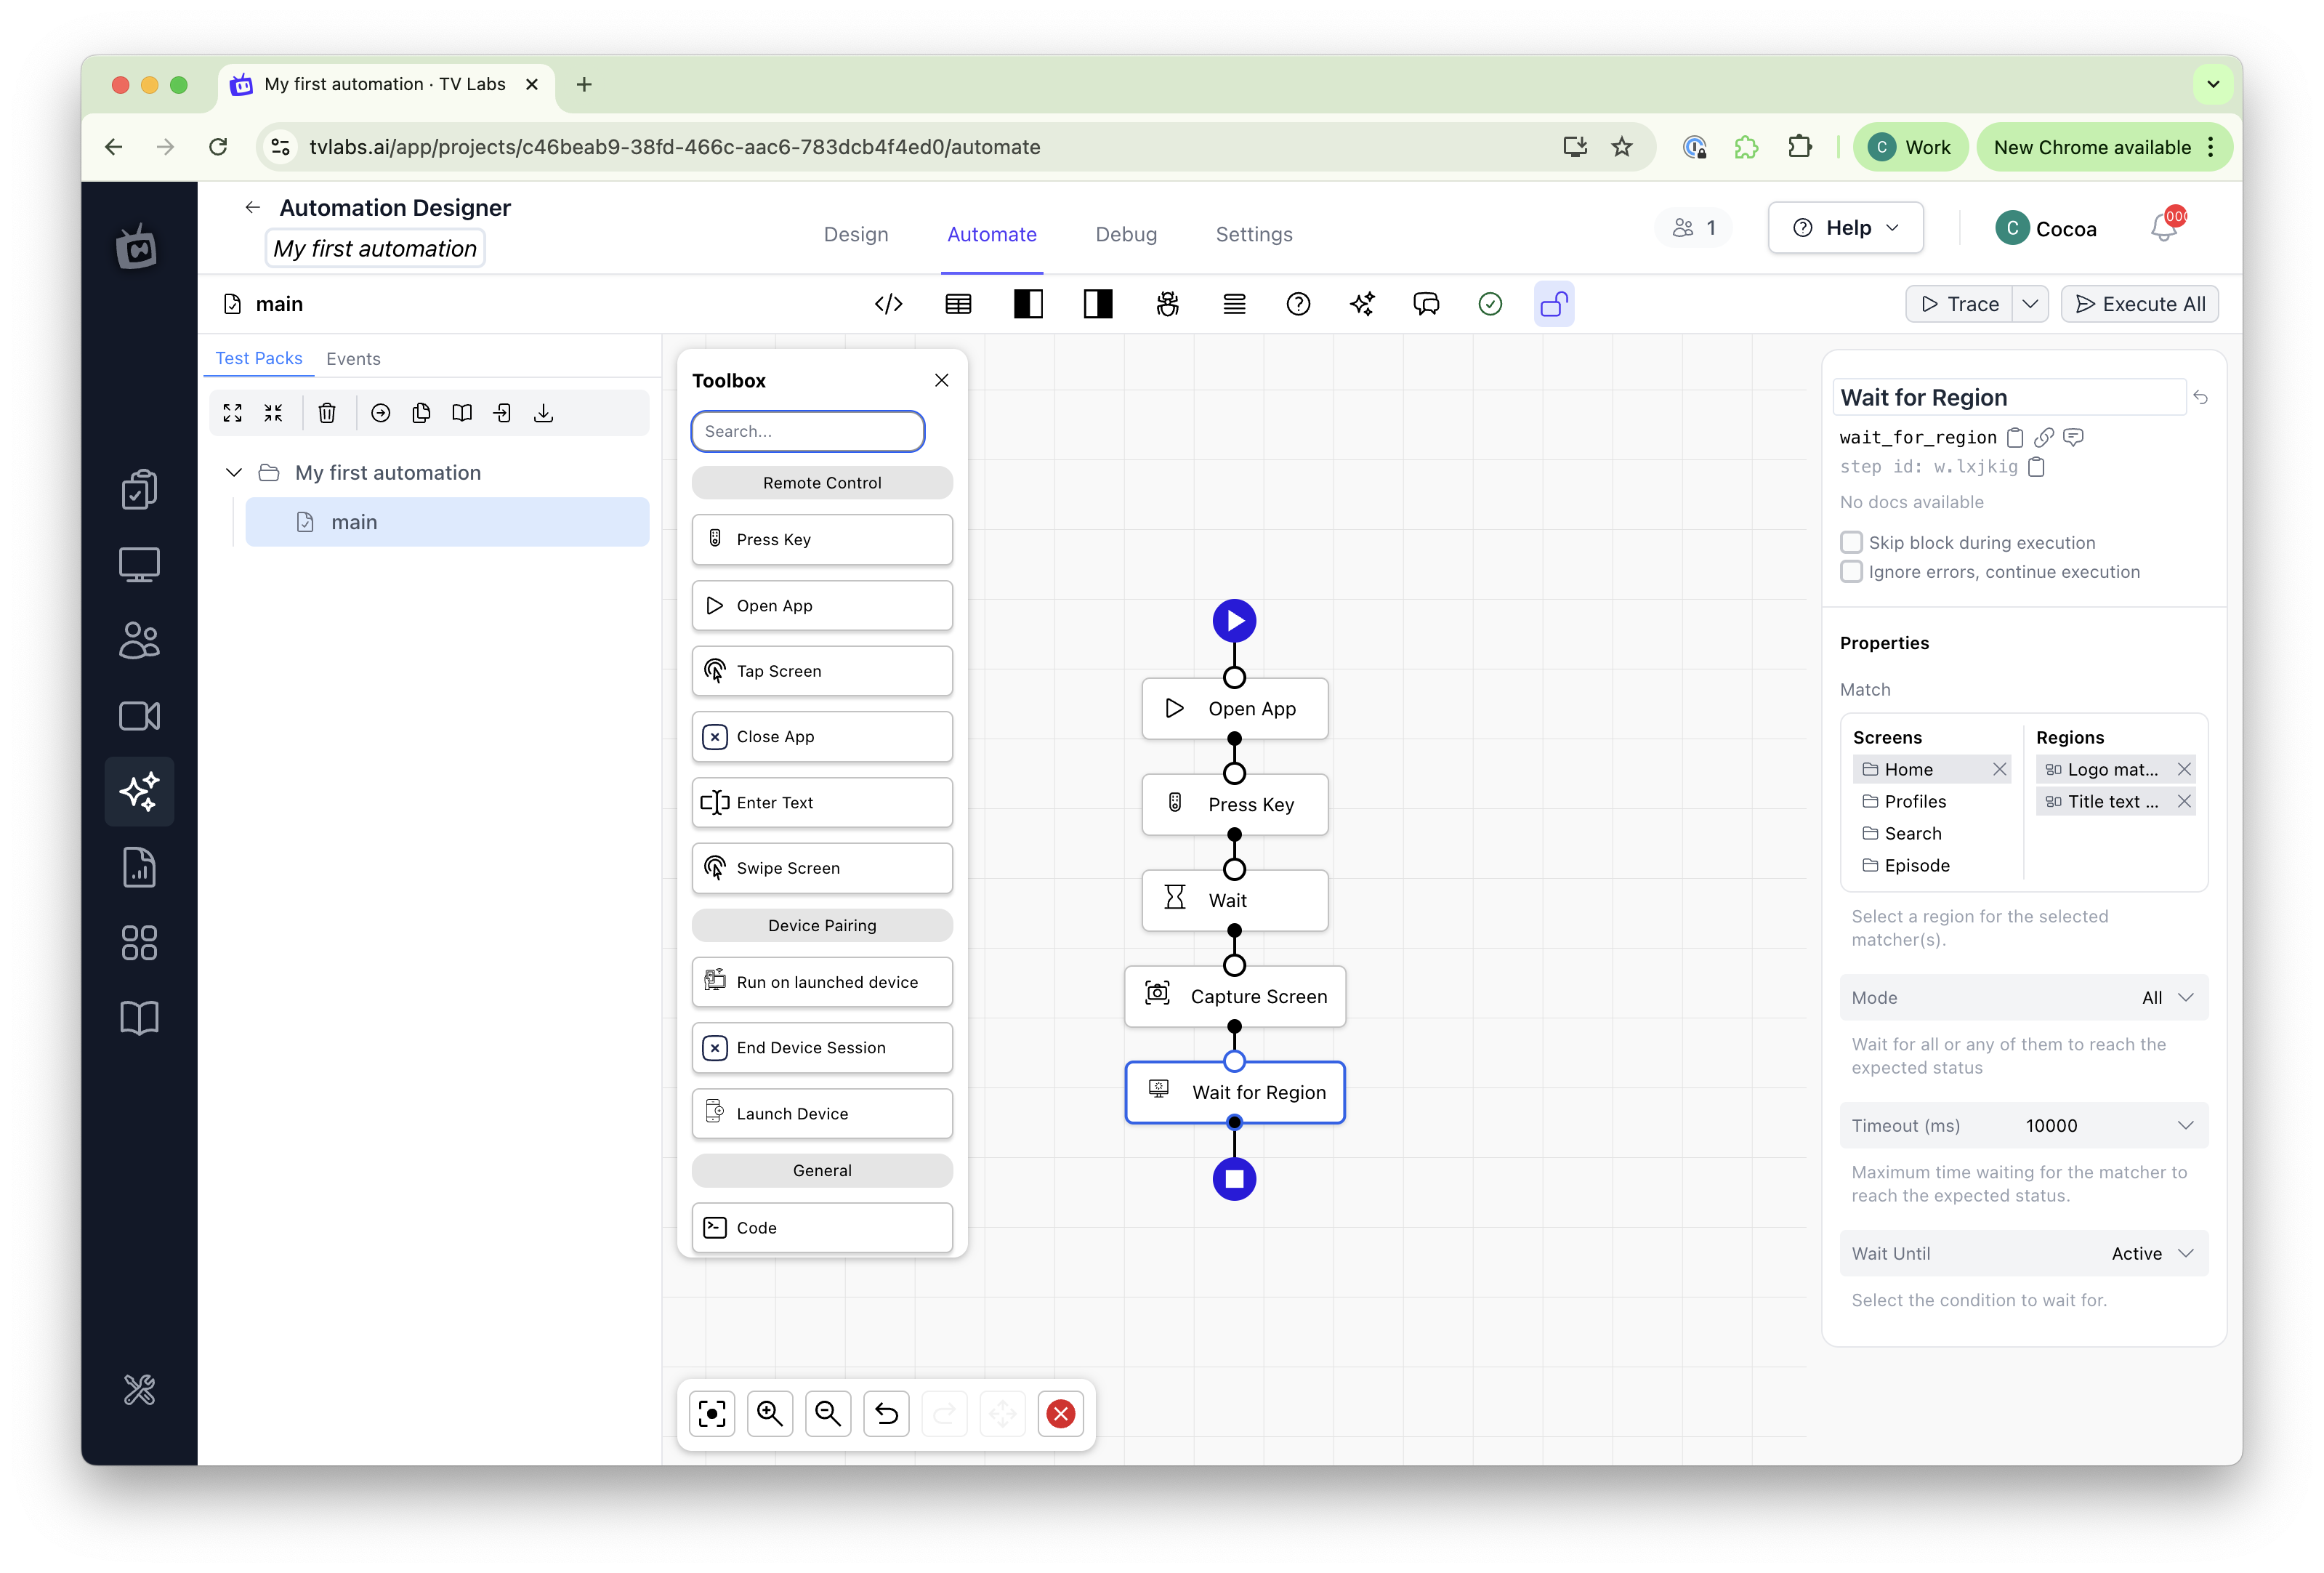 Figure 13: Setting up an Wait for Region block
Running Your Workflow
Let's execute the automation:
- Go to the Settings tab and select a target device
- For this example, choose "LG C3 Evo UK/Ireland"
- Select the app you're testing
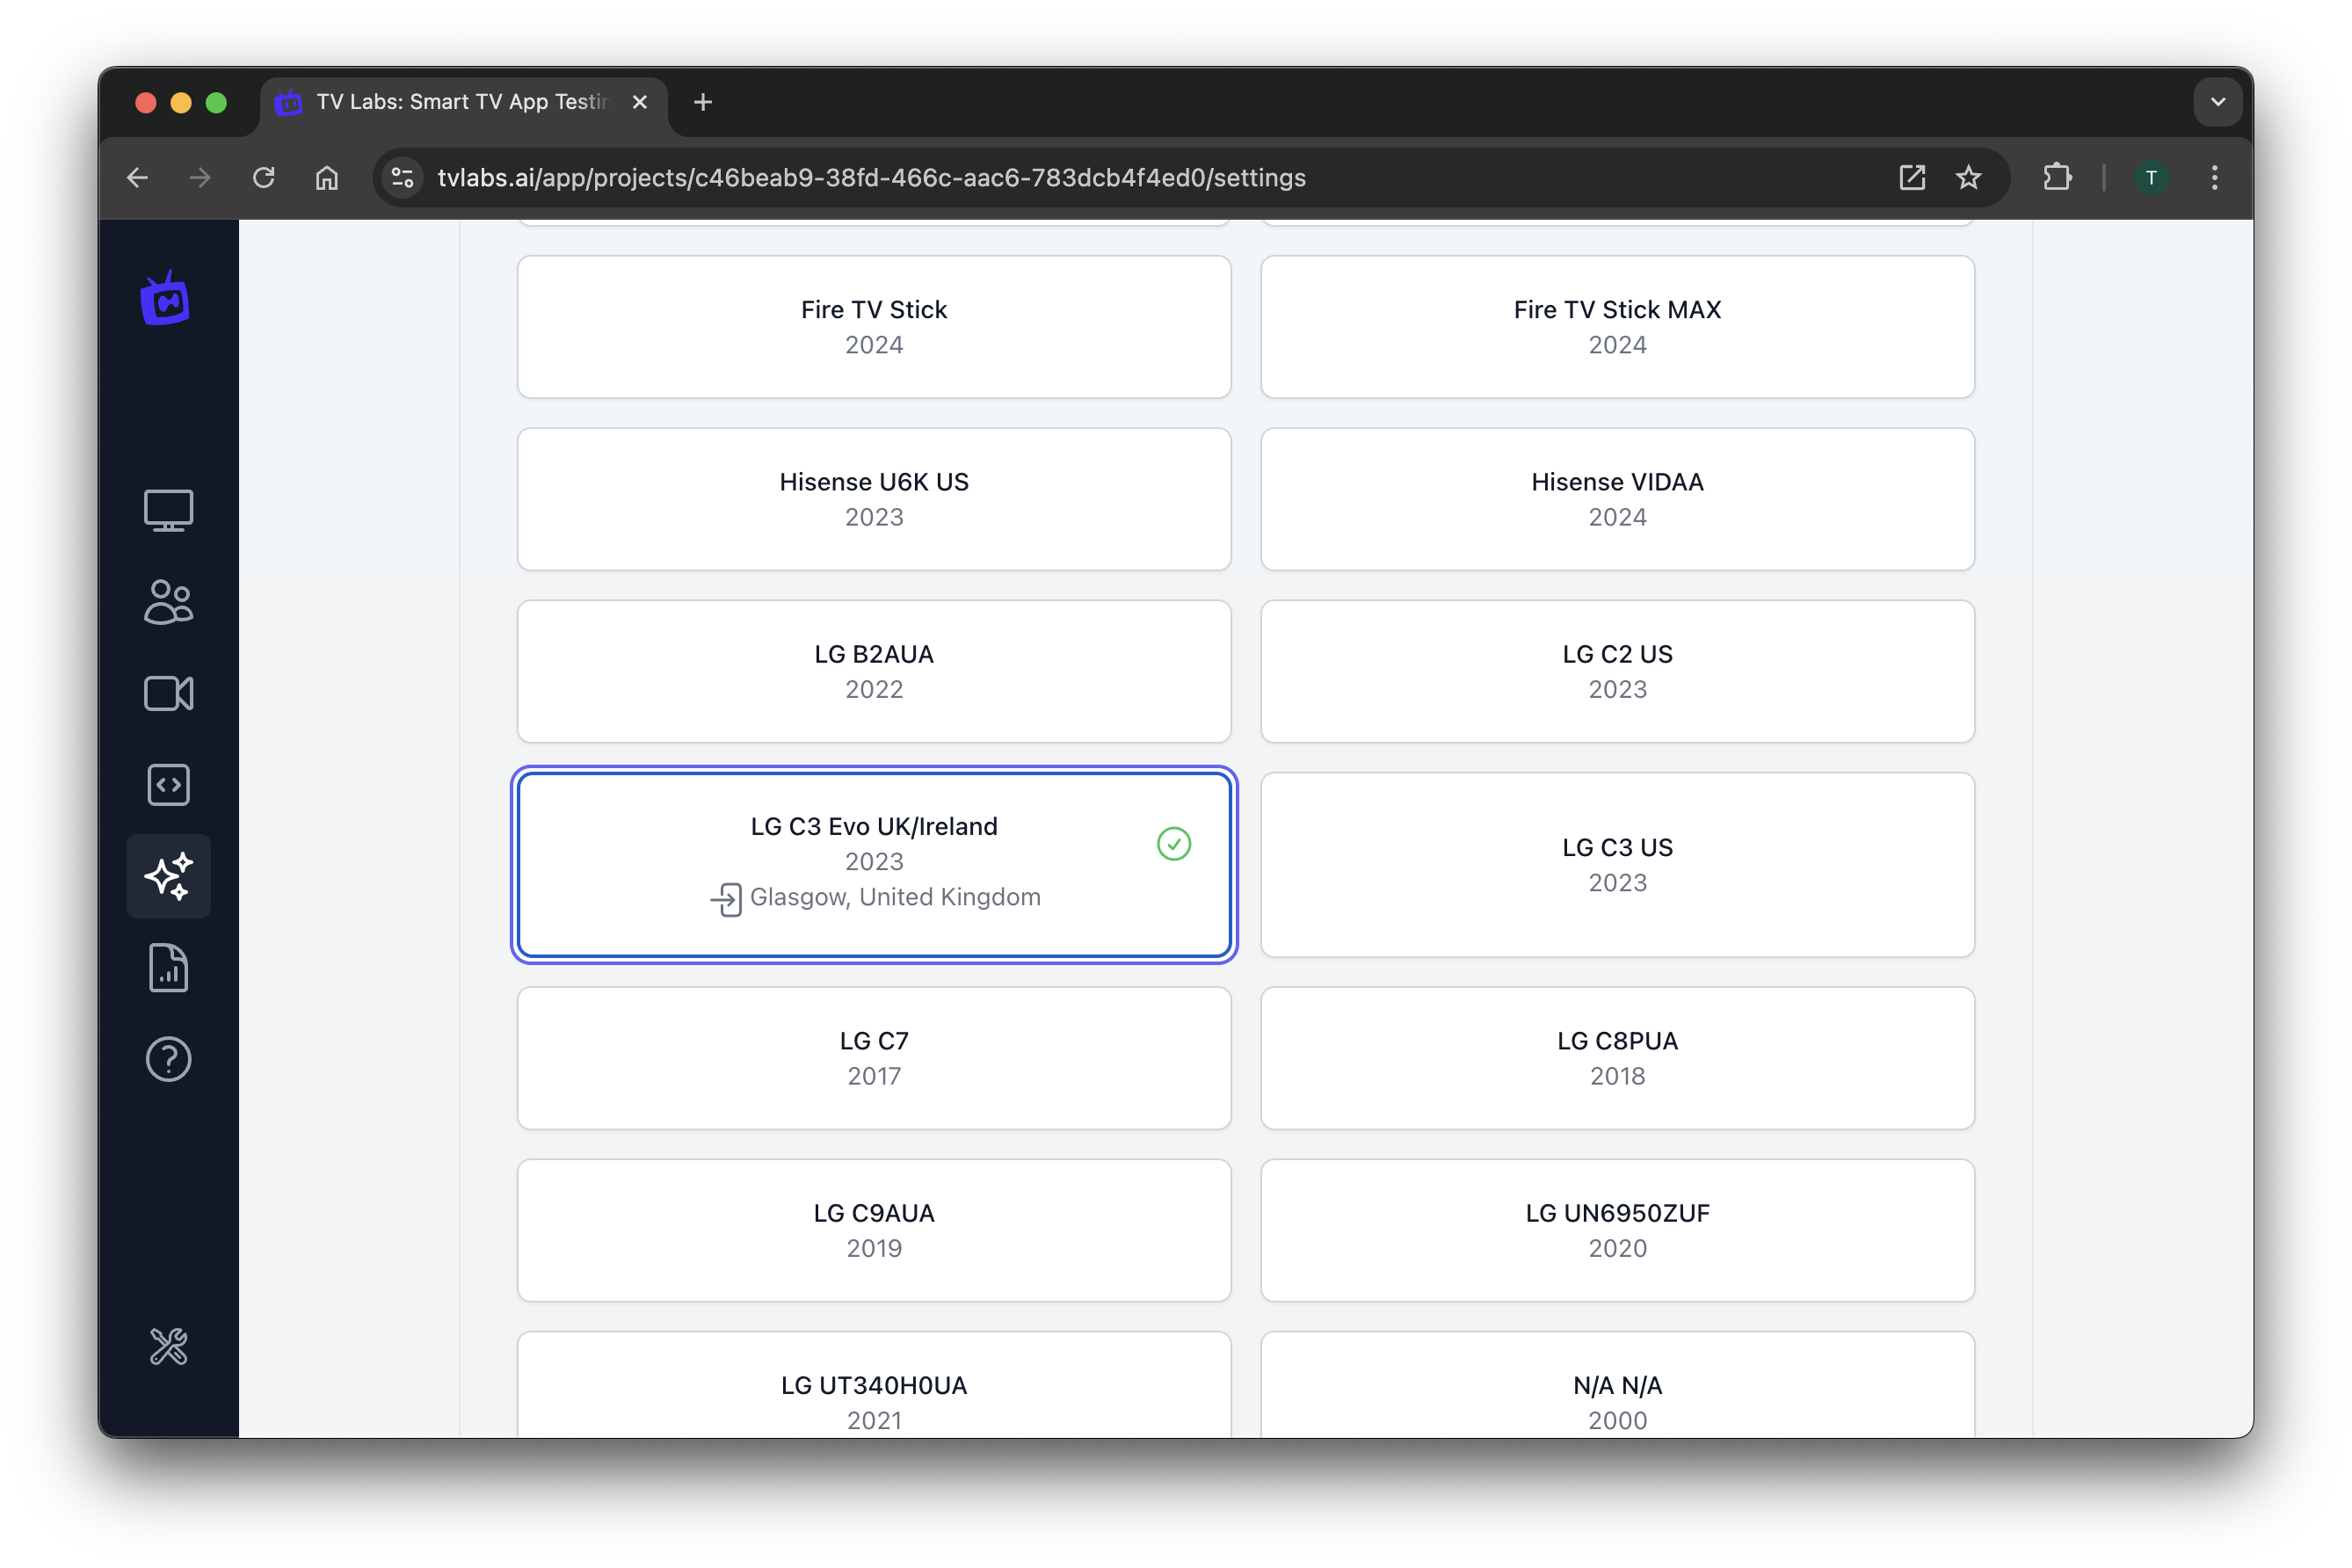 Figure 14: Selecting a target device
- Return to the Automation tab and click "Trace"
- Ensure the correct device is selected
- Click "Trace" again to start the execution
 Figure 15: Initiating the workflow trace
- Monitor the execution progress
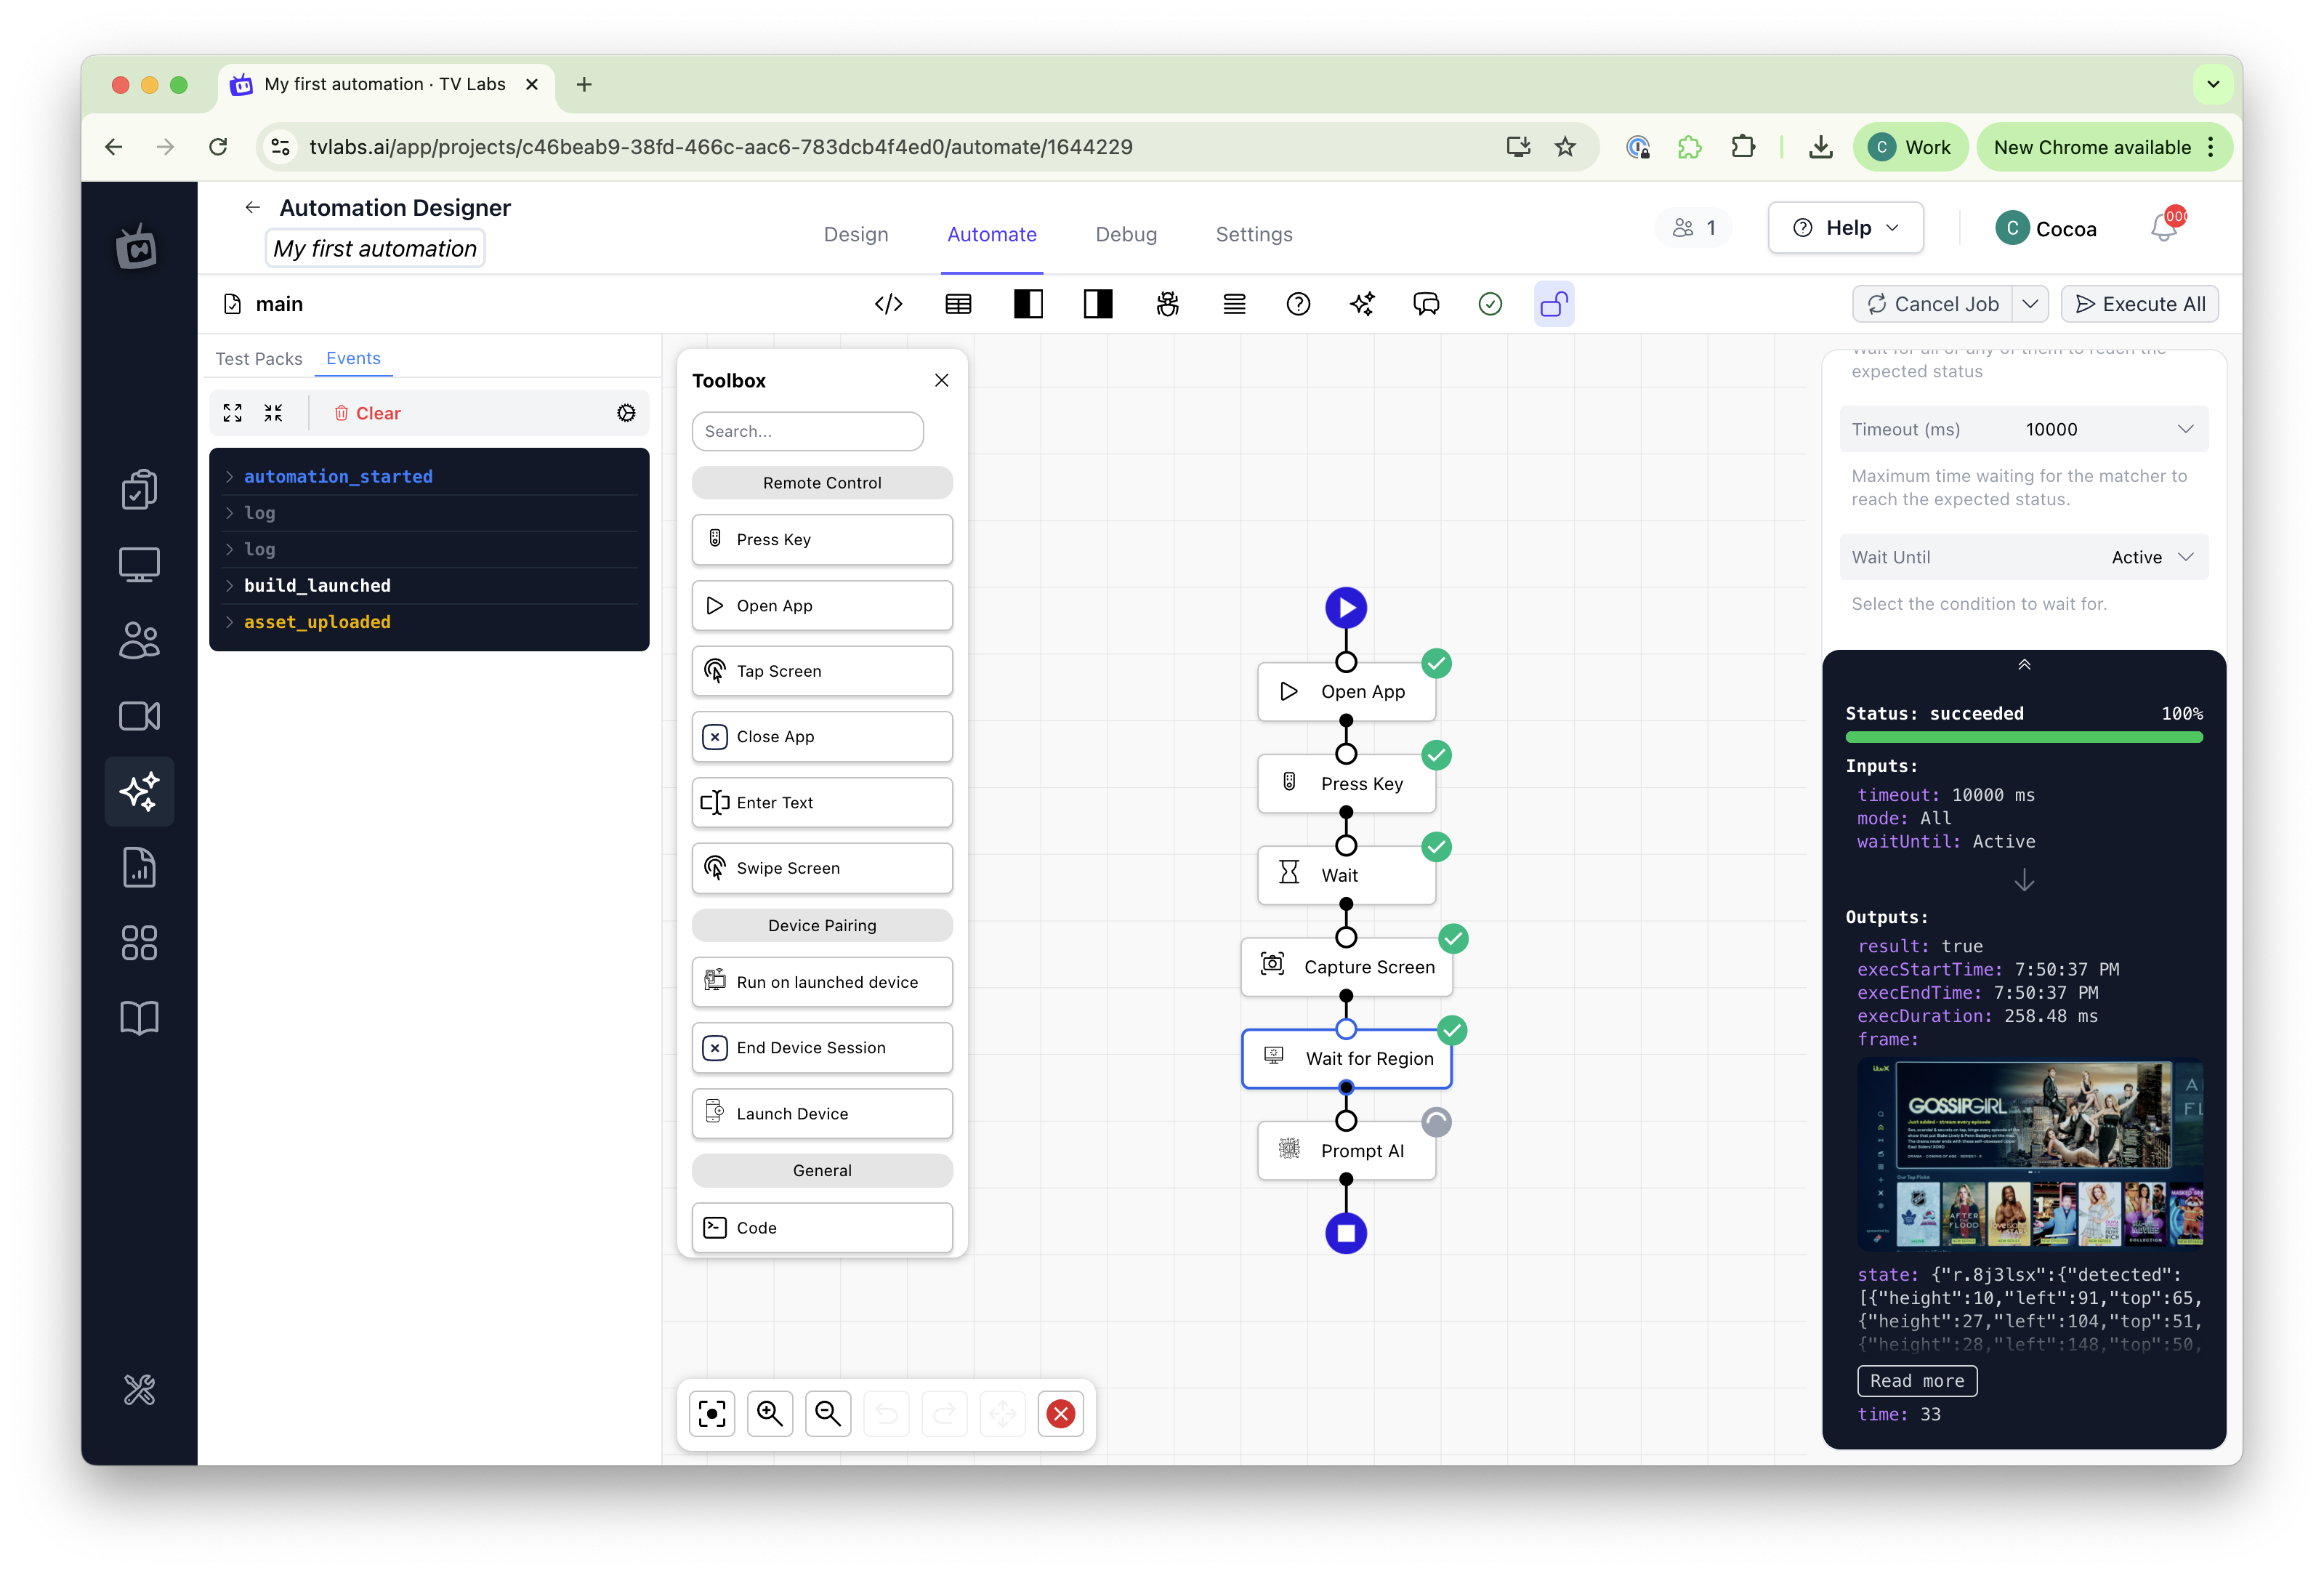 Figure 16: Workflow execution in progress
-
Review the results
- Check for successful blocks
- Examine inputs and outputs of individual blocks
-
You can view the generated code by toggling the "Code" button
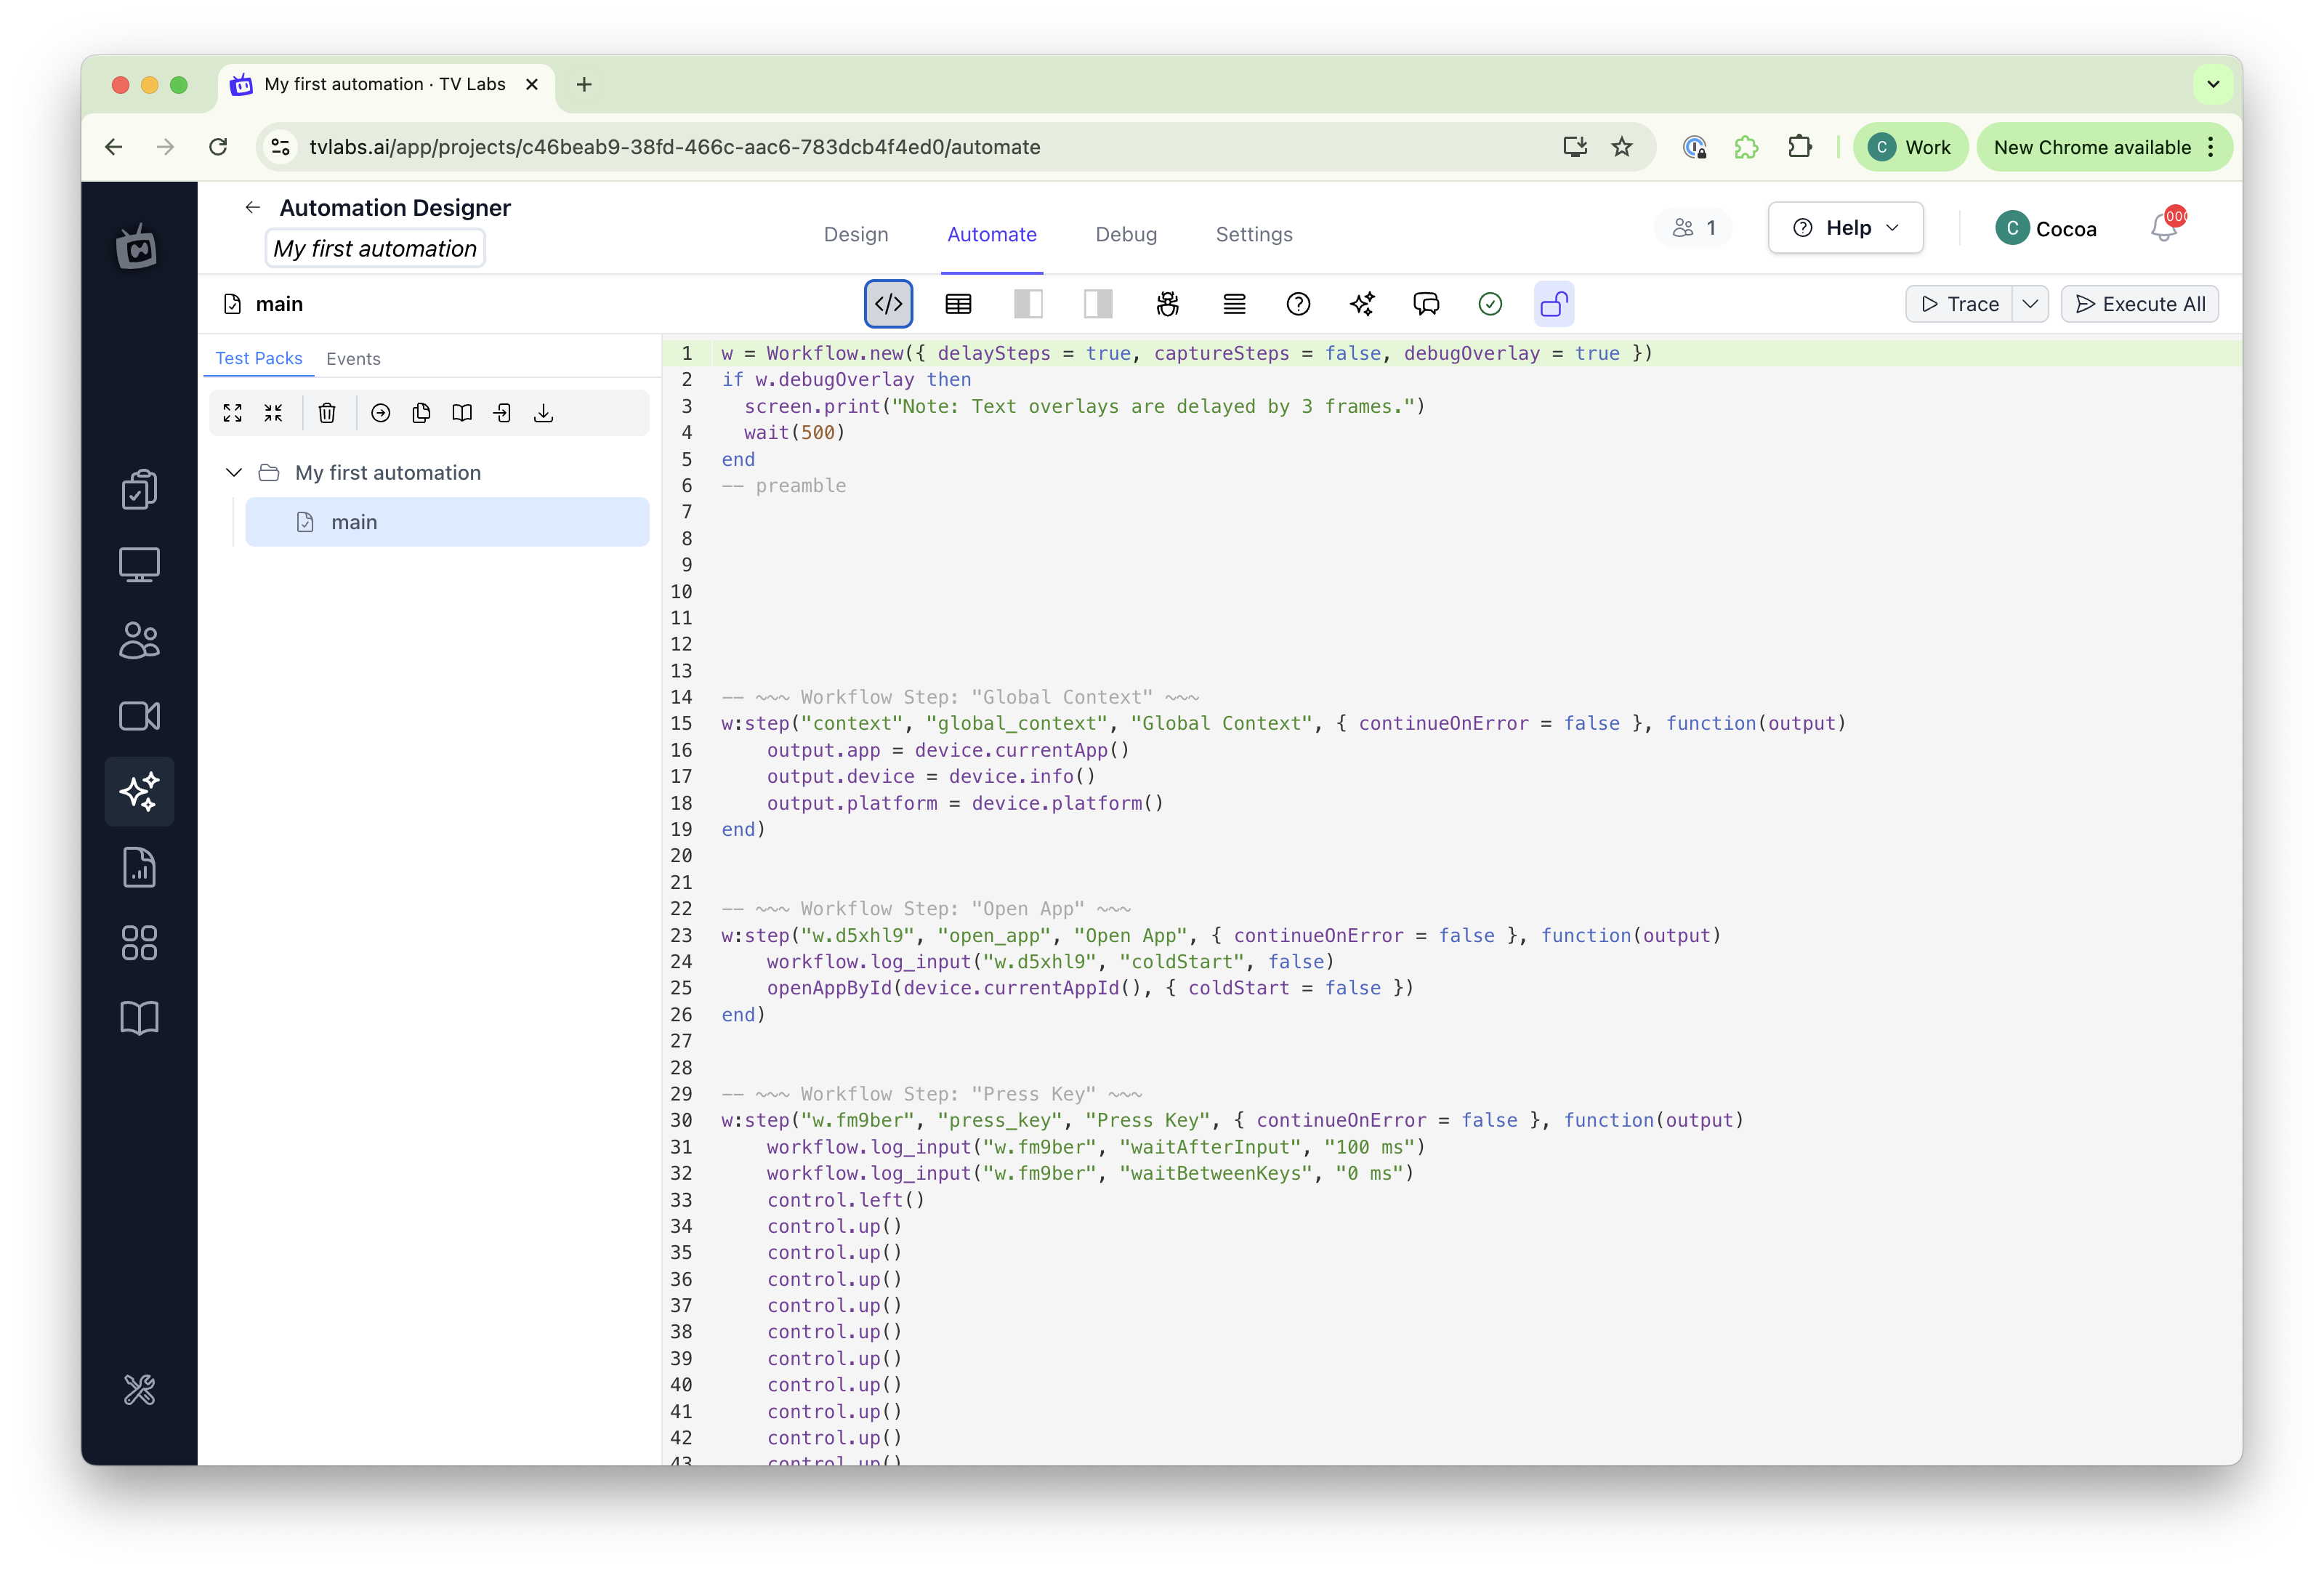 Figure 17: Viewing the auto-generated code
Conclusion and Next Steps
Congratulations! You've successfully created and run your first automated test using TV Labs. This workflow demonstrates the potential of vision-based automation for testing smart TV apps.
To further explore TV Labs capabilities:
- Experiment with different matchers and regions
- Create more complex navigation patterns
- Run your test across multiple devices and platforms
Happy testing!